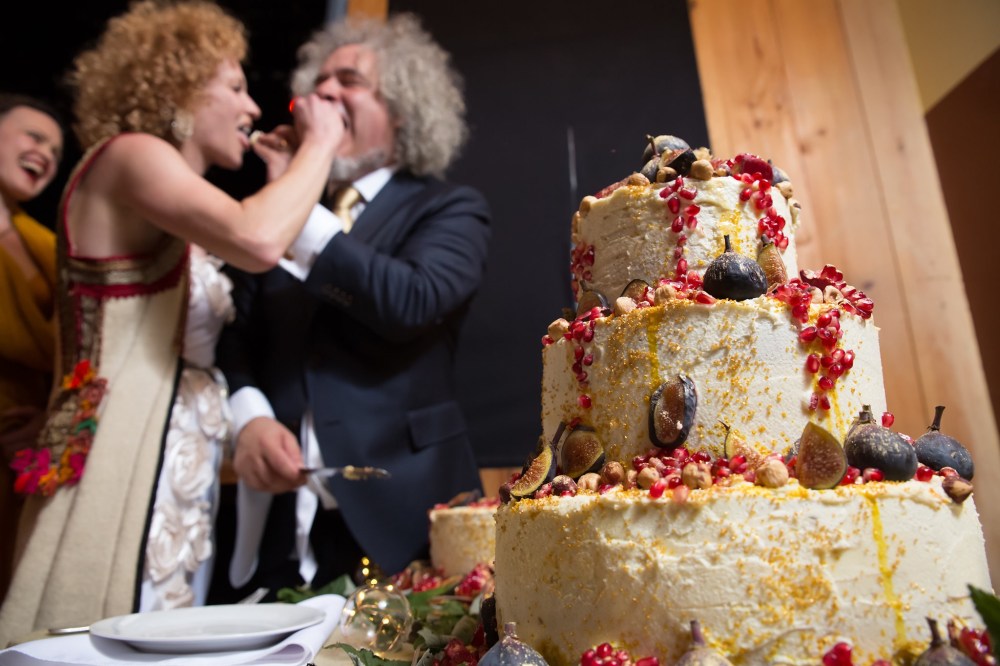
This time last year, I was developing a wedding cake recipe for my dear friends Sxip and Coco. They were married in a forest surrounded by love, golden leaves, and a brass band. It was a joyous alchemical joining of two forces of nature.


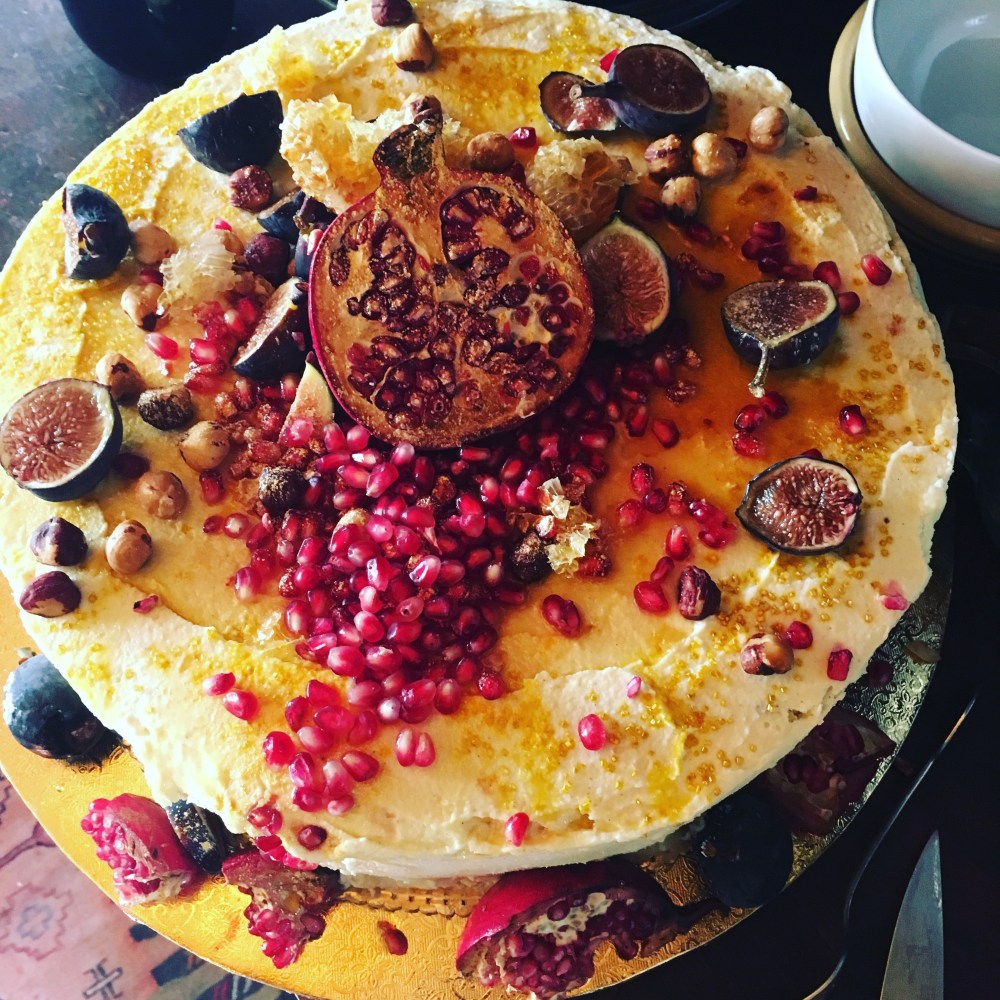
I was excited to make a wedding cake that was bold, sensual and overflowing with abundance. These are fierce, generous, creative, beastly humans. This recipe was created as a fertility spell that would support them as they created their life together whether that meant fluffy haired children or astonishing art or a community of fellow beasts and creators…or ALL of that! The choice to use figs, pomegranate and honeycomb was guided partly by the season, partly by a color scheme of black, red and gold, and mostly by instinctual spell making. Pomegranates are the food of the underworld or subconscious, where creative people toil. Honeycomb speaks to community and the wonders and sweetness that it can produce. Also, these things are all delicious!


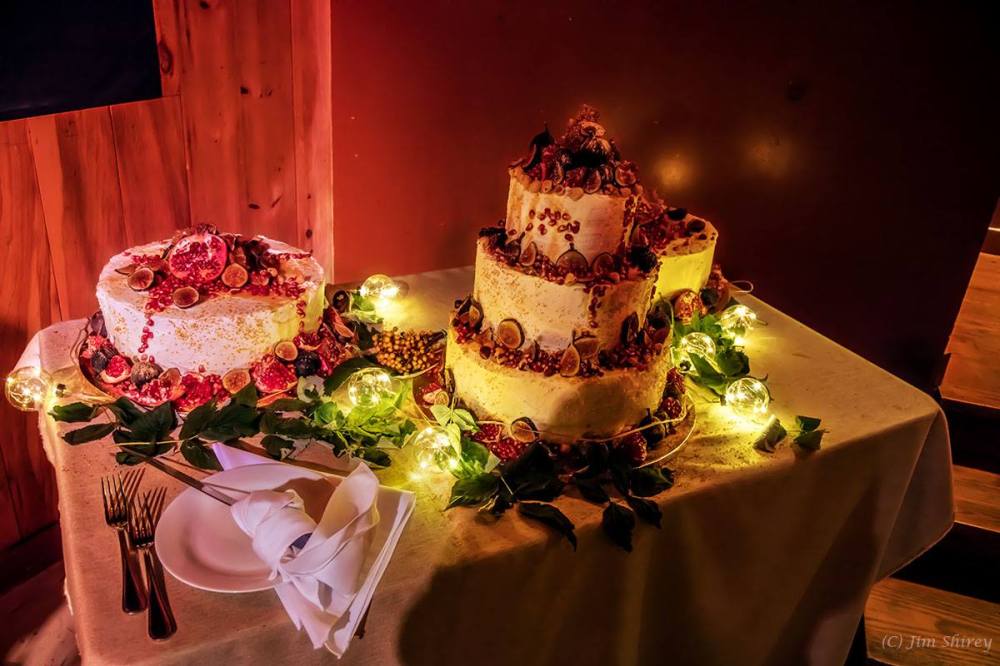
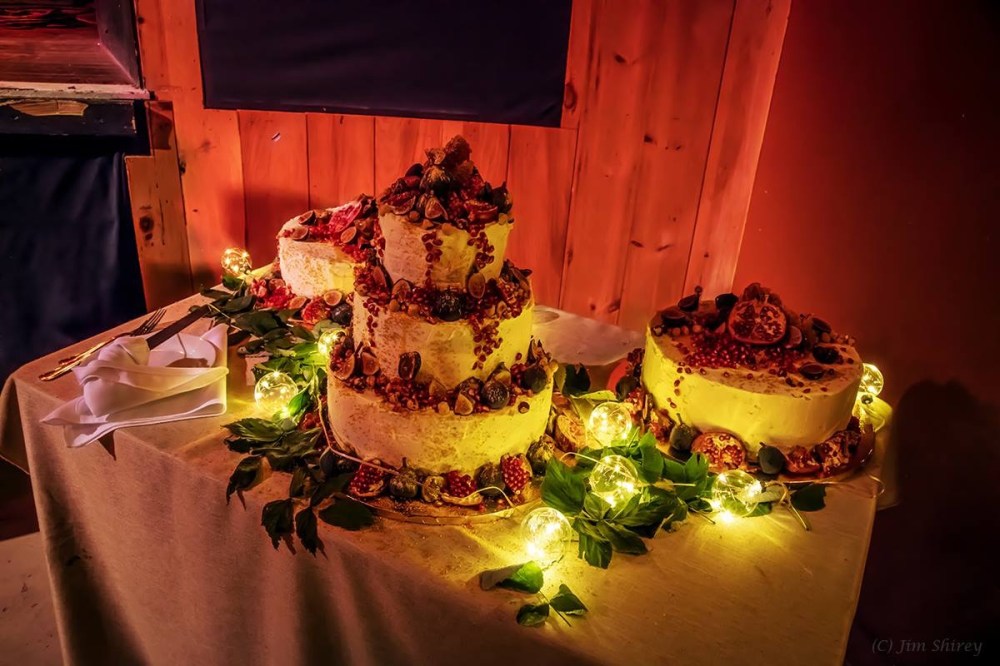
The wedding cake table was set up in the reception hall right next to the stage and dance floor. After the dinner and before cake, there were amazing performances and dancing. Whatever you are picturing when I say performances and dancing, I just know it can’t possibly capture the reality of it. Some of the most amazing storytellers, singers and musicians I can think of were at this wedding. At one point, my husband and I formed a human barrier (along with a few other should who were invested in getting to eat the cake) between the cake and over 100 people being drawn into the ever tightening spiral of an Albanian folk dance.


Neither Sxip or Coco are fans of cake. We talked about making tarts instead, but I don’t have the equipment to make tarts for 150 people. Also, I had fed Sxip and Coco cake at dinner parties which they both proclaimed “delicious! And I don’t even like cake”… so I knew I could make something that would be rich and substantial rather than fluffy and overly sweet. I decided to make a brown butter and hazelnut financier because Sxip used to bring hazelnuts back to New York from his family’s Ohio farm. Because they use nut flour, financiers are rich rather than sweet, full of actual nutrition and easy to make gluten free (Which was a required for Coco’s sake).
A financiers is a fairly simple cake to make for a small dinner party, especially if you have a standing mixer). However, it turns out that there are reasons no one uses financiers for wedding cakes. I think I would do it again, but if you reading this post with an eye toward actually making this cake for 100 plus wedding guests there here a few things you should consider
SHOULD YOU USE FINANCIERS FOR YOUR WEDDING CAKE?
Pros
- Financiers are sophisticated, not too sweet and (for cake) quite nutritious.
- They improve for a few days after being made, even when kept at room temperature, making them a good choice for someone who cannot stay up baking for 24 straight before the wedding and/ or someone who does not have a freezer large enough to store all those cake layers.
- They are sturdy and tend to bake without doming or falling, making them easy to stack into towers. Financiers are not very lofty, so you don’t have to slice them horizontally into three layers. You just bake the financier three times and stack them up.
Cons
- The ingredients for this cake are VERY expensive.
- Toasting and grinding this much hazelnut flour takes a long time.
- Browning this much butter takes a long time.
- Separating this many eggs takes a long time.
- Be warned that financiers call for many, many egg whites. So, you need to have a plan for what you will do with your leftover egg yolks. I tried freezing mine using directions that I found on line and I was not happy with the results at all. If I were going to this again, I would start freezing egg whites every time I made a custard, curd or sauce that called for egg yolk months in advance. Egg whites freeze and keep beautifully.
 I don’t make icing very often. I’m more of a naked cake with fruit kind of girl and I know from previous experience that my skills with piping are minimal. I made my friend Bethany’s cake a few years ago and was so grateful that one of the other bridesmaids was a surgeon with steady and precise hands who was willing to take over the decoration. Luckily, my friend Maria offered this truly excellent white chocolate and creme cheese icing recipe. This icing was so easy to make and use and so very delicious, that I don’t really see any attempt at piping buttercream flowers in my future. Maria is one of my favorite people to cook with and, in addition to the icing recipe save, she helped with the cake construction and decoration at the wedding AND she spoke at the ceremony.


I’m publishing a recipe here for a 6-inch, three-layer version of this cake that serves just 10-15 people. If you want a wedding cake for 150 people feel free to hire me. If you really want to do it yourself you can scroll to the bottom of the post for tips on scaling the recipe up, managing the timing, special tools that you will most likely need to purchase and helpers you will need to enlist. Even if you are just making this 6 inch version there are some particular tools that you should gather before hand.
USEFUL TOOLS (and work arounds if you don’t have them)
- A standing mixer (ideally) or a large bowl (and a friend to hold it) while you whip egg whites with an electric hand mixer. I don’t recommend trying to beat this many egg whites by hand. I have not made this icing without a standing mixer, but I feel like it could be done with the help of a strong friend to pass the beating task to when you get tired.
- A food processor or blender to grind the nuts into flour. If you don’t have one buy hazelnut flour instead of whole hazelnuts.
- Parchment paper to line your cake pans. This is cheap and readily available at in the baking section of any normal grocery store. You need this. No, buttering and flouring the tin does not work just as well.
- A fine mesh strainer to get lumps out of your curd and strain solids out of you browned butter. Not an expensive item and it will come in handy for other cooking tasks in the future.
- A double boiler for making the curd and melting chocolate. I don’t have one myself. I just use a metal boil placed over boiling water in a sauce man. It works just fine.
- Three 6 inch round cake pans. If you only have one, make the entire batch of flour mix and the entire batch of browned butter (steps 1-4) and then complete the rest of the recipe (steps 5-9) one third at a time. If you make the whole batch of batter and let 2/3 of it sit around waiting for it’s turn to bake, the whites will deflate.
 FOR THE POMEGRANATE CURD
This can be made up to a week in advanced stored in a sealed container in the fridge
- 1/3 cup pomegranate concentrate (I suggest Perfect Puree brand. No they aren’t paying me. If you are starting with juice rather than concentrate, you will want to begin with twice as much and cook it to reduce it by half. The color will not be as brilliant)
- 1/3 cup sugar
- 2 egg yolks (save your egg whites for the cake! They can be refrigerated for a few days or frozen for weeks)
- the juice of 1/2 lemon
- pinch of salt
- 1 Tablespoon unsalted butter
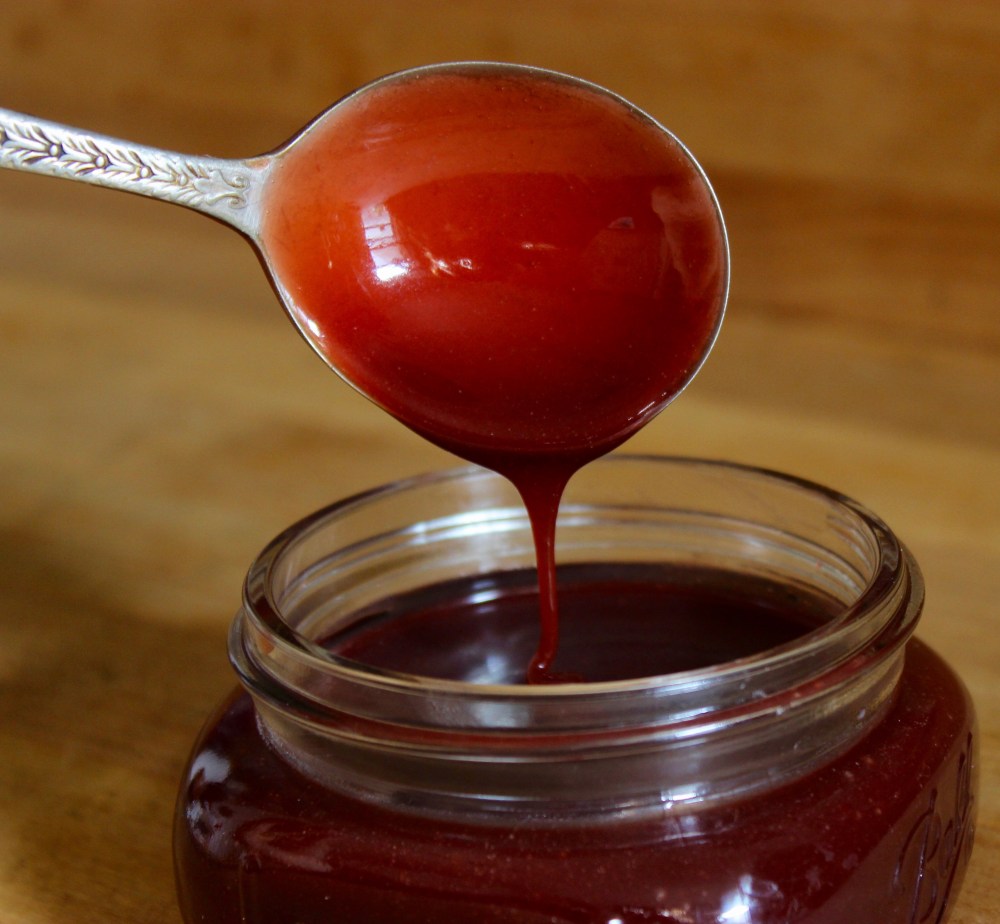
- Whisk the sugar and egg yolks together until light in color. Whisk in the pomegranate juice, lemon juice, and salt and put on a double boiler.
- Cook while stirring constantly while the mixture thickens. You will know it is finished once the mixture coats a spoon and you run your finger down the back of the spoon and leave a trail. Stir in the butter.
- Remove the curd and push through a fine mesh strainer. Place in a jar and allow to cool completely before placing in the refrigerator. Whatever you don’t use for your cake is dreamy with yogurt for breakfast.
 FOR THE HAZELNUT BROWN BUTTER FINANCIER CAKE (GLUTEN-FREE)
You can make the browned butter, toast and grind the hazelnut flour and start gathering egg whites weeks before making this cake. The butter and toasted hazelnut flow can be stored in the fridge in a sealed container and egg whites can be frozen.
- 10 Tbs butter
- 4 ounces hazelnuts
- 1 and 1/2 cup sugar, divided in half
- 1/2 cup brown rice flour
- 1/4 cup tapioca starch
- 1/4 cup arrowroot starch
- The zest of 1/2 lemon
- Seeds scraped from ½ vanilla bean
- 1 cup room temperature egg whites (from 7 or 8 eggs)
- a pinch of salt
- Heat the butter over a medium-low flame in a small heavy bottomed sauce pan. Keep your eye on it. Eventually, the butter will foam up and the solids will sink to the bottom and turn a golden brown color. When this happens, strain the butter through a fine mesh sieve and set aside to cool. Do not refrigerate. You want it cool but not solid.
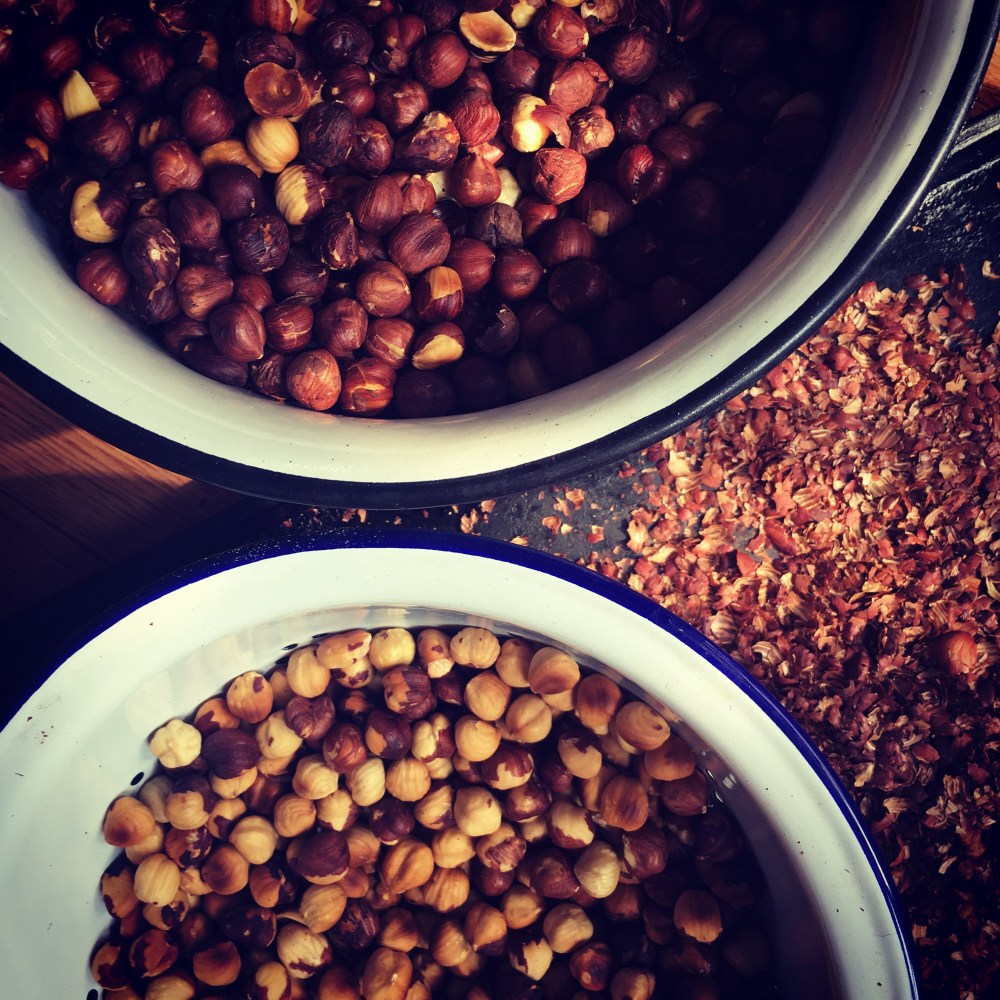
- Spread the hazelnuts in a single layer on a baking sheet and bake them for about 10 minutes or until they are nicely toasted.
- Allow the toasted hazelnuts to cool a bit and then rub them between your hands to remove most of the skins. When the hazelnuts are totally cool, combine them with 3/4 cup sugar in a blender or food processor and pulse until they are finely ground.
- In a medium bowl, combine the ground hazelnut and sugar mixture with the brown rice flour, tapioca starch and arrowroot starch. Add lemon zest and seeds scraped from the vanilla bean to the flour mixture and mix to ensure that the flavorings don’t clump (I use my hands to do this).
- Preheat the oven to 350 degrees and position a rack in the center of the oven. Butter three 6″ round cake pans. Line them with a circles of parchment paper (you can use the cake pan to trace the circle). Butter the parchment paper too. This step is important.
- Put egg room temperature egg whites in a standing mixer with a pinch of salt and whip them until they form soft peaks. Beat in the remaining 3/4 cup sugar in a slow steady stream. Continue beating, until the whites form soft peaks again.
- Starting with the hazelnut mixture, alternately fold in the dry ingredients and cooled brown butter in one-third at a time. Divide the batter evenly amongst the three prepared pans.
- Bake the cake for 30-50 minutes or until it is golden brown and firm in the center. I have found that ovens vary wildly so I just start checking the cake after a half hour in case your oven runs hot generally or runs hot in certain places.
- Allow the cake to cool a bit before turning it out of its pan, removing the paper and cooling it totally (right side up) on a rack.
FOR THE WHITE CHOCOLATE ICING
This recipe was provided by Maria Dahvana Headly from her copy the Macrina Bakery Cookbook. I’ve just decreased the recipe and added vanilla bean. This icing can be frozen if you want to make it in advance.
- 6 oz white chocolate coursly chopped
- 4 oz (1 stick) unsalted butter at room temp
- 1/2 pound cream cheese at room temp
- 1 Tb freshly squeezed lemon juice
- The seeds scraped from 1/2 vanilla bean
- Melt chocolate in double boiler, then cool to room temp.
- Make sure all ingredients are room temperature.
- Beat butter in a standing mixer with a paddle attachment until smooth (3-5 minutes).
- Add cream cheese and beat another 3-5 minutes until fluffly with no lumps.
- Add lemon juice and beat to incorporate.
- Add chocolate and continue mixing unti lit is light and smooth (2 minutes).
- If it gets too soft refridge a bit to firm up.
- To refresh after refrigeration bring to room temp and beat with paddle for 3 minutes.
FOR ASSEMBLY AND DECORATION
- fresh mission figs
- pomegrante
- honey comb
- edible gold dust (we used some very fine powder, which was lovely on the dark figs and some larger gold sugar sprinkles which show up well in the photo above)
- toasted hazelnuts
Step 1. Filling
As picture below, spread a layer of pomegranate curd on the bottom and middle layers of the cooled cake, leaving about 1/2 inch curd free around the outer edges. Pipe a layer of icing around the edges (you can use a zip lock with a snipped corner if you don’t have a pastry bag. It does not have to be pretty. The piped icing just prevents the curd from smoothing out the side of the cake once the pressure of multiple layers and declaration gets piled on. If you skip this step, the curd might seep out and ruin the nice white icing.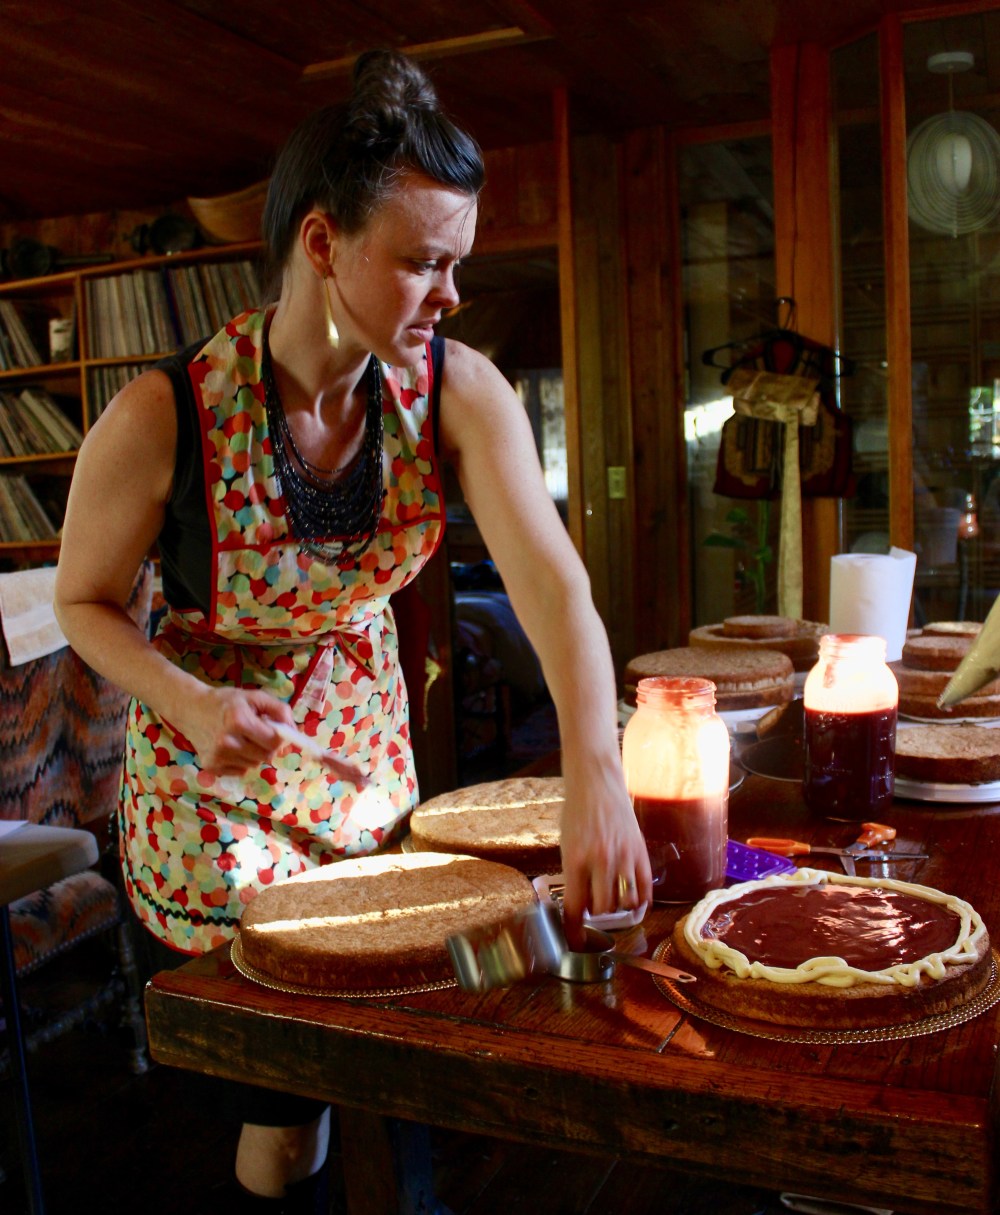
Step 2. Stacking and crumb layer of icing
Stack the layers with the naked layer on top. Don’t fret if the layers are not entirely lined up and even. You can disguise this with icing. Resist the urge to trim the sides of your cake layers to make them match up. The icing does not like to stick to trimmed. Ice the top and sides of the cake, using the icing to even out the shape of the cake. This will mean that the icing will be quite thick in some areas and thin and others (see photo below). In addition to fixing the shape, the purpose of this layer of icing is to trap any crumbs and make a smooth surface for the final layer. When you are done refrigerate the cake, covered in plastic wrap until the icing is cool and set. Don’t try to add the final layer of icing on a warm crumb layer.
Step 3. Final Icing
To do this final step, the cake with it’s crumb layer should be cold and the icing that you are about to apply should be a spreadable room temperature. Ice the cake with a nice clean, even final layer of icing. Don’t torture yourself about making it flawless. You are going to pile heaps of sexy fruit and drizzle honey all over it. 
Step 4. Decoration
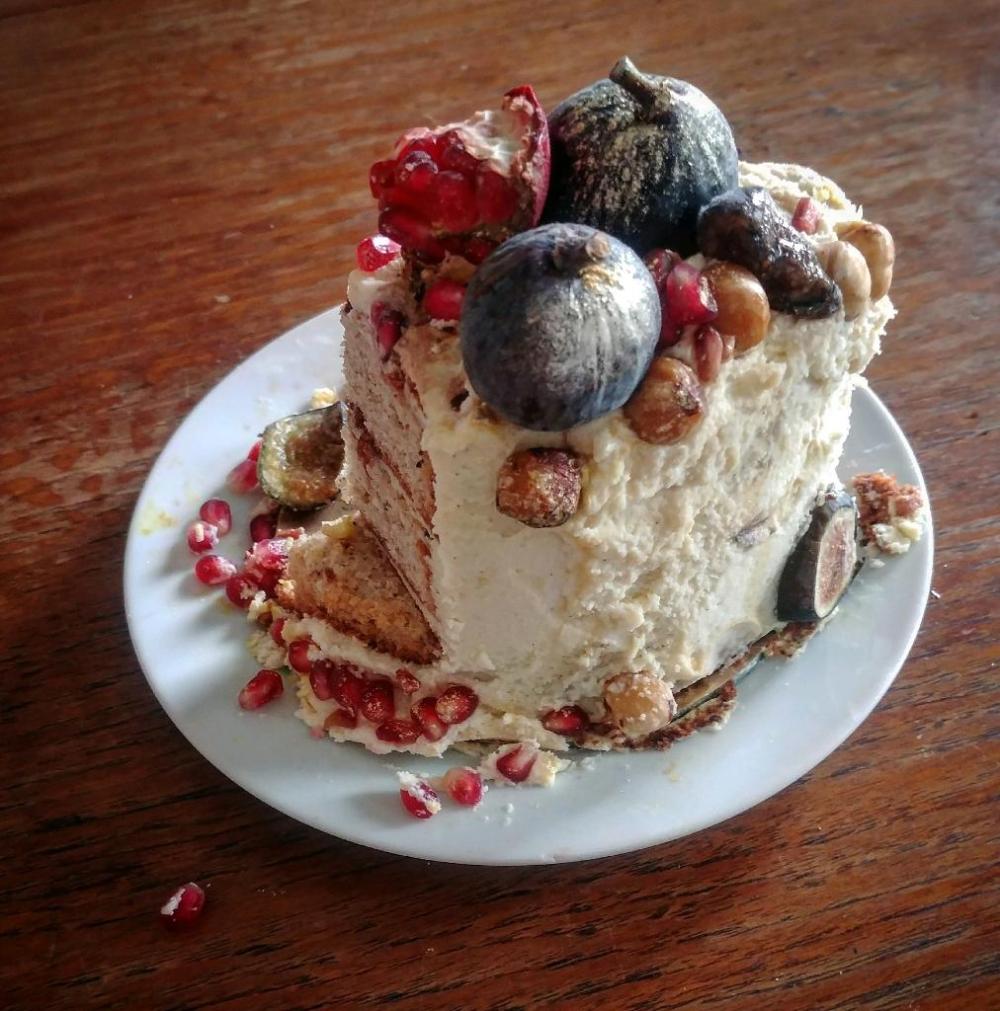
- Use halved pomegranates, whole figs and big hunks of honeycomb to build height
- Add pomegranate arils, halved figs and toasted hazelnuts around the base of the cake and tumbling out of the larger pieces to create the impression of a cornucopia or overflowing, dutch still life.
- Add drizzles of honey and dustings and sprinklings of edible gold to make sure that it all looks sumptuous and magical.
- When we were done, Maria said that the cakes reminded her of Irving Penn’s food photography which sounds about right. If you are a more precise sort of person, please feel free to apply those talents to making something minimal and geometric here. I was going for sensual bounty because the bride and groom are bold and bountiful humans…but also because I was playing to my own strong suits which don’t lie in the elegant and minimal world.
SCALING THE RECIPE UP
I used the 6 inch three layer recipe in this post for the very top tier of Sxip and Coco’s cake, a 9 inch three layer cake for the middle tier and a 12 inch three layer cakes for the bottom tier. I also made two more 12 inch three layer cakes for extra. It was really enough cake for 175 people. The bride and groom kept the 6 inch layer for themselves and we had a whole 12 inch cake leftover for day after wedding breakfast! To scale my recipe up or the larger tiers I followed the mathematical formulas found at the bottom of this Smitten Kitchen post (Scroll all the way down to the bottom, past the recipe).
RECOMMENDED TIMING AND NUMBER OF HELPERS
- AS MUCH AS A WEEK BEFORE THE WEDDING. You should make the curd in advance. You can also make the browned butter and hazelnut flour mix (steps 1-4 of the cake recipe) in advance. These should all be kept in the fridge once they are prepared. You’ll need to melt the browned butter again before continuing with the recipe. I spent 2 days doing these steps.
- TWO OR THREE DAYS BEFORE THE WEDDING. Bake each of the cake layers (steps 5-9 of the cake recipe) Complete these steps for however many layers you can bake in your oven at once, and then repeat those steps for the next batch while the first batch bakes…and so on until you are done. You cannot make the entire batter in advance and have it sit around waiting for hours to be baked. It will deflate. I spent 1 day mixing and baking all the layers… and that was with a helper and 2 ovens. As I mentioned before, financiers keep well at room temperature for a few days. So, if you are doing this alone in a regular kitchen, allow a couple of days.
- DAY BEFORE THE WEDDING- Buy the fresh figs and pomegranates for the decorations. Make the icing. Stack your layers with pomegranate curd in between for each tier. Do the crumb layer of the icing on each tier. Wrap each tier in plastic wrap and refrigerate them. Having the crumb layer hard will make it MUCH easier to do a nice job with the final layer of icing. I had a helper for the stacking, icing and decorating step and it was really helpful. It still took a couple of hours.
- DAY OF THE WEDDING- Take the remaining icing out of the fridge to come to room temperature first thing in the morning!!! Mine froze in an overactive fridge and it was very stressful. Once the icing is revived, take the cakes out of the fridge to do the final layer of icing and decoration the morning of the wedding. The cake sat decorated in the reception hall for 5 or 6 hours before being eaten and it was still beautiful and delicious. The reception hall needs to be cool though. Don’t try that for a barn wedding in August okay?
ADDITONAL SPECIAL TOOLS FOR MAKING MANY TIERED WEDDING CAKE
- fI you are scaling this recipe up to make a wedding cake for many people, please, please, please buy borrow or steal a standing mixer.
- You will need dowels and a little saw to cut them with to give the tiers enough structure to be stacked on one another.
- Buy more cardboard cake rounds for each of the tier sizes than you think you will need. They are cheap and they come in handy for moving layers around.
- Icing is way easier with an offset spatula. Get two, so a friend can help you.
- A pastry bag is helpful for sealing the edges of the curd with icing, but a hole cut in a ziplock will work in a pinch and you certainly don’t need any special pastry tips for this cake.
- I felt very extravagant buying a little plastic lazy Susan to help with icing and it was worth every penny.
- I found it helpful to watch ha few youtube videos on how to dowel and stack the cakes.
MORE WEDDING PLANNING HELP…


You have done an absolutely stunning job of that cake. Has that beautiful autumn feel to it. I bet the bride was happy! (:
What an amazing creation! So gorgeous and I’m sure totally delicious. I love all the photos showing all the joy and magic of this celebration. Your fertility spell worked, well done! ❤️
Gorgeous post about a gorgeous event. And you are simply amazing! I knew it must have been a heroic act of love to make that cake, but I didn’t know just how heroic. Wow.
Love you, R
On Sun, Sep 30, 2018 at 6:09 PM Big Sis Little Dish wrote:
> Big Sis Little Dish posted: ” This time last year, I was developing a > wedding cake recipe for my dear friends Sxip and Coco. They were married > in a forest surrounded by love, golden leaves, and a brass band. It was a > joyous alchemical joining of two forces of nature. I was e” >
I had kind of forgotten myself!
This cake was absolutely delicious. So impressive to look at but so yummy too. Thank you for sharing how you did this. It was definitely worth all the effort you took. Joanne
Thanks Joanne!