
In August, I had the pleasure of cooking for a group of twenty or so artists at The Freight, an artist’s residency run by photographer, aerialist and puppeteer extraordinaire, Rachael Shane. For the last six years, Rachael has invited artists to spend a week in a beautiful house built by her architect father and potter mother near Cambridge, NY. The artists have access to workshop space, dance studios and an exquisite historic theater in which to develop new work that is then presented at Hubbard Hall in Cambridge and Cloud City in Brooklyn. The artists are also fed, and for three days this year, they were fed by me!


I cook food for large groups of people fairly often. I don’t always blog about it because I usually don’t have any time to take photos when I am trying to produce massive amounts of food. Also, when I am making large amounts of food and trying to stick to a budget, I only make recipes that I have made many times and that I know are excellent. In other words, I make recipes that I have already shared here or recipes invented by people who are far more adept at cooking than I am.


That said, I took tons of photos while cooking at the freight. The kitchen and house and handmade pottery were all so ridiculously beautiful. Every time you reached for a plate to do some pedestrian thing like catch tomato juice or watermelon seeds, it would just happen to be the perfect plate for watermelon or tomatoes. The bowl you grab to corral your chopped red onion is glazed like a distant galaxy and suddenly your onions look celestial! It’s a wonder I got any food on the table at all, I was so caught up in taking pictures. You can see more of Regina Wickham’s pottery here.


Also, as I mentioned before, Rachael is an amazing professional photographer, so many of the photos here are hers. In honour of all of the amazing photos that were taken, I am posting photos and links to most of the recipes that I cooked at The Freight. You’ll find the hyperlinks in the body of the text and also attached to the photogallery at the end of the post. I’m also re-posting Tomato Pie, because it was one of the first things that I blogged about on Big Sis Little Dish and only my mother, sister and a few other friends and family members saw it back then. My Tomato Pie recipe has continued to develop over the years, and some things are worth revisiting.
One more note. I was not cooking gluten-free at The Freight, since I was the only person with that dietary restriction. I’ll include directions for making the gluten-free recipes ‘gluteniscious’ and vice versa.


On the first night, I made Tomato Pie with Corn and Basil served with Green Bean and Radish Salad with Almonds and Pickled Onions. I can’t even tell you how many hundreds of times I made this tomato pie in my 20’s and early 30’s. The original recipe was from my favourite book of food essays, More Home Cooking, by Laurie Colwin. I blogged about my (not gluten-free) version in a this post about home-made mayonnaise. A few years later I blogged about my gluten-free version here. For this version I added corn, because we bought most of our ingredients for The Freight from the local farmers market at the height of corn season in upstate New York. Likewise, I made the green bean salad because the beans at the market were so beautiful.

TOMATO PIE WITH CORN AND BASIL
serves 4-6
For the tomatoes
- 2 pounds ripe tomatoes
- 1 or 2 cloves roughly chopped garlic (optional and only needed for roasting)
- a bit of olive oil (optional and only needed for roasting)
It’s important to remove excess juice from the tomatoes as it will make your pie a soggy mess. Also, I highly recommend removing the skins, as they have an unpleasant, tough texture when cooked. There are two options for you to consider.
- If your tomatoes are full of in season flavour and large, the fastest way is to follow the directions for peeling and seeding tomatoes found here. Save your tomato seeds and juices for soup, such as the watermelon gazpacho that you will find if you scroll down. Once the tomatoes are peeled and seeded, roughly chop them.
- If you are working with smaller tomatoes, such as Roma or cherry tomatoes, and if you have a bit of time, I highly recommend slow roasting the tomatoes so that all of that juice and those seeds get concentrated rather than removed. This can work with large tomatoes too, but it will take even longer. You can find the directions for slow roasting tomatoes here. Skip the rosemary. I often pick out the larger tomato skins once they are roasted, if they seem tough.
For the Corn and Basil
- 3 ears fresh, in season corn
- 1/3 packed cup minced fresh basil (chives or scallions will work too) OR (my preference) 1/3 cup pesto (homemade or store bought)
If you have a bundt pan, use this method for cutting the kernels off of the corn. It’ll change your life. Otherwise, cut the corn in half so that you have two shorter lengths. Place the cut end on a cutting board and use a very sharp knife to slice the kernels off. Either way, after you’re done cutting, scrape the corn cob to get every bit of kernel out. Corn cobs are a really good addition to an experimental economical soup stock, so throw those in the freezer for later! Combine the corn with the herbs or pesto and give them a quick whir in a food processor or blender. You can also just chop them together a bit by hand.
For the Mayonnaise and Cheese
- 1/3 cup store-bought mayonnaise thinned with the juice of 1/2 lemon OR homemade mayonnaise made from 1 egg yolk, 1.2 teaspoon salt, the juice of 1/3 lemon and 1/2 cup mild oil (directions below)
- 1 and 1/2 cup grated extra sharp cheddar cheese
If you are making mayonnaise (it’s easy!) combine the egg yolk with the salt and lemon juice (seeds strained out) in a blender or food processor. Whir them for a few seconds and then, with the motor still running, pour the oil in a steady SLOW stream. The mixture should emulsify and thicken. If at any point the oil seems to be hanging out, rather than incorporating let it whir for a while before adding any more oil. Seriously, this whole process takes about 3 minutes and homemade mayonnaise kicks the ass of store-bought.
For a (not gluten-free) Buttermilk Biscuit Crust
- 2 cups white flour
- 1 stick butter
- 4 teaspoons baking powder
- about 3/4 cup buttermilk or (my preference) whole milk plain yogurt
- Pre-heat the oven to 400 degrees.
- Combine the flour and baking powder in a large mixing bow.
- Cut the butter into the flour until it is like course cornmeal with a few pea-sized chunks of butter left. I use my fingers and work quickly. If the butter starts to melt put it in the freezer for a few minutes. The butter needs to stay cold.
- Add the yogurt bit by bit and gently combine with the flour using a fork. Do not knead! It should make a ball of soft but not to gooey dough.
- Roll half of the dough out on a floured surface and use it to line a 9 inch pie plate.
- Spread half of the tomatoes out in the bottom of the pie crust followed by half of the herbed corn, then half of the cheddar and then half of the mayo. Repeat these layers with the other half of the ingredients.
- Roll out the other half of the crust and seal the pie. Cut vents in the lid. Bake the pie for 25 minutes. Let it cool a bit before eating it.
For a Gluten-Free Buttermilk Biscuit Crust
- 3 Cups Jeanne’s Gluten-Free All-Purpose Flour Mix, sifted (you can find the recipe for the mix here)
- 3 Tablespoons baking powder
- 3/4 teaspoon baking soda
- 3/4 teaspoon salt
- 6 Tablespoons butter, cold
- 6 Tablespoons leaf lard or shortening, cold (or just use extra butter if you don’t use these)
- 1 cup buttermilk (or plain yogurt)
- 1 egg whisked with 2 tablespoons of water
- Preheat the oven to 400 degrees. Butter a 9″ pie tin and dust it lightly with rice flour.
- Combine the gluten-free flour mix, baking powder, baking soda and salt in a large bowl.
- Cut the butter into the flour with your fingers or a pastry cutter until the fat is in pea sized lumps. If using, cut the lard in to the flour until the mixture is the consistency of course cornmeal a few pea-sized lumps.
- Add the buttermilk or yogurt and stir to just combine.
- Divide the dough in half. Place half of the dough in the prepared pie tin. and put the other half in the fridge, in a bowl covered with a damp towel. Use damp finger to spread half of the biscuit dough across the bottom and up the sides of your pie tin. If it gets too soft and sticky put it in the fridge to cool off a bit. It is totally okay if this looks lumpy and ugly.
- Spread half of the tomatoes out in the bottom of the pie crust followed by half of the herbed corn, then half of the cheddar and then half of the mayo. Repeat these layers with the other half of the ingredients.
- Roll the chilled biscuit dough out between two sheets of wax paper that have been lightly dusted with gluten-free flour. Peel the top sheet of wax paper off and, using the bottom sheet of wax paper for support, flip the rolled out dough onto the top of the pie. Remove the wax paper. Trim the edges of the crust and pinch them together to make a fluted crust. Cut some steam vents into the top of the pie and brush the top with egg wash before baking for 30 to 35 minutes. Let it cool a bit before eating it.
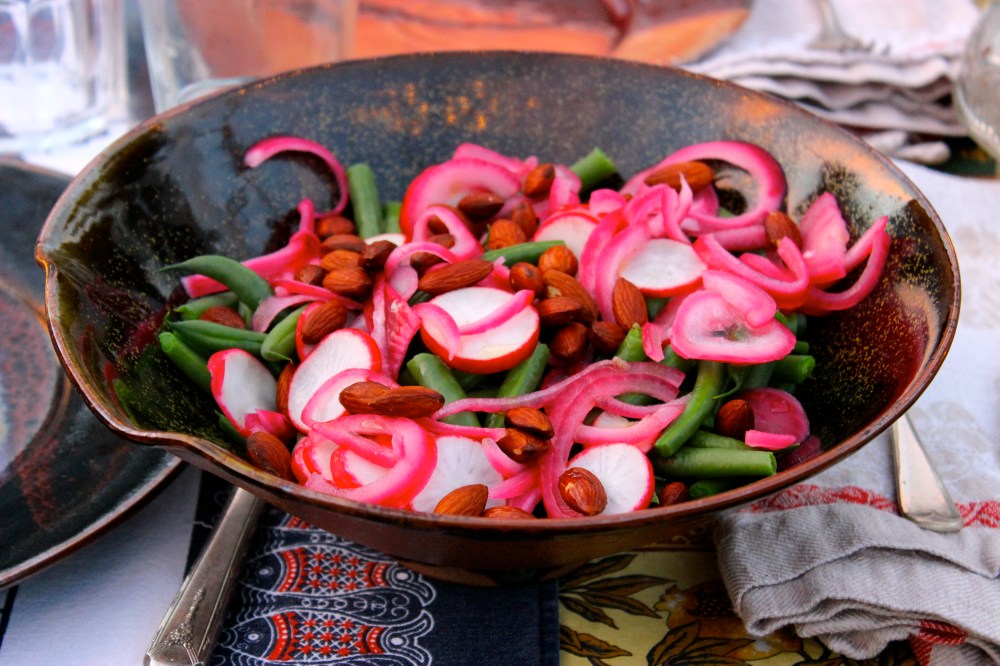
Green Bean and Radish Salad with Pickled Onions and Fried Almonds in pottery by Regina Whickham.
GREEN BEAN AND RADISH SALAD WITH PICKLED ONIONS AND ALMONDS
This is a paired down version of this salad
serves 6-8 as a side dish
- 1 red onion
- 1 cup red wine vinegar
- 1 cup water
- 2 Tablespoons Salt
- 3 teaspoons sugar
- 1 pound fresh green beans
- about a dozen radishes
- about 1/2 cup almonds
- Olive oil to fry the almonds and dress the salad
- Peel and half the onion lengthwise. Thinly slice the onion halves lengthwise. Place the onions in a large jar along with the vinegar, water, salt and sugar. Seal it, and shake it to encourage the sugar and salt to melt. You will have delicious pickles within an hour. Leftovers will keep for weeks if you put the jar in the fridge.
- Place your almonds in a small baking tray and stick them in an oven set anywhere from 250-350. I stuck them in with the roasting tomatoes and tomato pie.
- Bring a large pot of salted water to boil. While it’s boiling, trim and tail green beans. Boil beans until crisp-tender, about 4 to 5 minutes for regular green beans and about 3 minutes for skinny ones (haricot vert). Rinse them in very cold water as soon as you drain them to avoid overcooking. Wash and slice the radishes.
- Remove the toasted almonds from the oven and fry them in some olive oil over medium high heat until they are a very deep brown. Season with salt if you like…or not.
- Toss the beans and radishes together with some of the pickling juice and a splash of olive oil. Top with pickled onions and fried almonds and serve with tomato pie!


On the second day, I made buttermilk drop biscuits for breakfast. For my entire young adult life, these biscuits were my secret weapon and super power in my endeavor to make friends and loved ones. Imagine my horror when I had to stop eating gluten! (My husband still has his dented helmet from those days). You can find the recipe for my buttermilk drop biscuits and also a decent recipe for gluten-free cheese biscuits by clicking on this link.
For dinner, I made Smoked Salmon and Roasted Vegetable Hash with Fresh Herbs, Watermelon Gazpacho and Aperol Spritz to drink. My cousin Gary and his wife, Constance, gave me the hash recipe and I make it often. You can find the recipe for Roasted Vegetable and Smoked Salmon Hash by clicking here.
I have never blogged about watermelon gazpacho although it is one of my all time favourite summer recipes. I got this recipe from one of my favourite cookbooks, Small Plates and Sweet Treats by Aran Goyoaga. I cannot recommend this cookbook enough. It is full of delicious and creative food, including excellent recipes for gluten-free baking. The recipe was also published on Aran’s excellent food blog Cannelle et Vanille. Please follow the link to her blog for this outstanding recipe. It is pointless for me to reprint it here, since I cannot offer anything by way of improvement. By the way, I have also tried other recipes for watermelon gazpacho and this one is, by far, the best.
The Aperol Spritz was introduced to me by our dear friends Amy Foote and Ana Egge this spring and I have consumed an astonishing amount of the stuff over this summer. The weather is still hot (at least here in NYC). There is still totally time for you to become obsessed with this cocktail. You can find the recipe for an Aperol Spritz here.


Breakfast on day three was a giant frittata filled with potatoes, onions, beet greens and sharp cheddar (all ingredients leftover from other dishes). I am not a frittata making expert. In fact my giant frittata had to cook for more than twice as long as the recipes that I found on-line had suggested, but it turned out well.
For lunch, I returned to the tried and true: Curried Lentil Salad. This is another recipe that I got from my cousin Gary, who is clearly a major culinary influence for me. I have eaten this lentil salad a ridiculous number of times since he gave me the recipe a few months ago. You can find Cousin Gary’s Lentil Salad Recipe by clicking here.
I also roasted four chickens for lunch. Rachael ran into a family friend working at the food coop on one of our grocery runs. The coop did not have any fresh tarragon, which I had needed for the Roasted Vegetable Hash with Fresh Herbs. The family friend invited us to go to his house and pick some of his. “Take lots!” he said, “It grows like a weed!” So the leftover tarragon got tucked between the chicken breast and skin along with a few pats of butter. Some more tarragon was stuffed into the cavities along with some halved lemons. I followed these directions from Food 52 for roasting the chickens, more or less. I reserved some of the chicken breast for the health conscious to eat on sandwiches and made all of the dark meat into curried chicken salad. I used the same spice mix that I had used in the salad dressing for the curried lentil salad combined with homemade mayonnaise made with a whole egg. To get the mayonnaise recipe, click here. I also added many stalks of celery, diced very fine, a large handful each of golden raisins and sliced almond and salt to taste. All of the chicken bones were made into Homemade Chicken Stock along with leftover corn cobs and other vegetable trimmings.


On my final night, dinner was Roasted Butternut Squash and Goat Cheese Tart in a Poppy Seed Crust served with a big farmer’s market salad and Meringues with cardamom and Almonds for dessert. The tart recipe is from the excellent cookbook Ottolenghi, although this was the first time I had ever made it using wheat flour instead of my own gluten-free adaptation. I have to say that this dough behaved better with gluten-free flour! The original wheat flour version shrunk a lot in the pre-baking and I know for a fact that tart and pie crusts made with rice flour are less likely to get soggy than ones made with wheat. You can find my gluten-free version of the recipe for Roasted Butternut and Goat Cheese Tart in a Poppy Seed Crust here.
The salad is a recipe that my sister and I refer to as “Ride Your Bike to Coney Island Salad”. We made this salad one day for breakfast and then rode our bikes from Astoria, Queens to Coney Island, Brooklyn. That’s about twenty miles in case you’re wondering…and we felt great. This salad was one of the first ten recipes that we posted on Big Sis Little Dish back in 2010, along with Tomato Pie and Homemade Mayonnaise. The Ride Your Bike to Coney Island Salad post doesn’t even have any photos, but you can find the recipe by clicking here, and it is still excellent. For the dinner at The Freight, I skipped the goat cheese (since there was already goat cheese in the tart) and added toasted Pepitas (aka pumpkin seeds). Toasted Sunflower seeds would have been good too.
I had a lot of leftover egg whites from making many batches of egg yolk mayonnaise, so for dessert we made meringues. I still had some cardamom left and sliced almonds left from the curried lentils/ chicken salad, so those got tossed into the mix too. For directions on how to make meringues click here. Just replace the lemon zest and poppy seeds with cardamom and sliced almonds and remember that they have to cool completely in the oven before you disturb them or they will deflate. SO start ’em early!
LINKS TO THE RECIPES IN THIS POST….
")


All sounds wonderful, looking forward to more of your blog.
Such beauty! The food, and the setting, and YOU! xoxo