 Right before I left on vacation, I had the pleasure of co-teaching a cooking camp for kids at the Sunview Luncheonette in Greenpoint Brooklyn. The Sunview is an old, classic Luncheonette turned social club and microvenue for art, poetics, regionalism, mutual aid, and commoning. Members of the Sunview can hold community events, such as teaching seven young boys how to cook and then helping them to prepare and serve a three course dinner to their families at the end of the week. My partner was Noah Mayer, whose work in life is to think up and organize fascinating, hands on experiences through which children can learn about themselves and the world. His does this amazing work through his school and home school resource center Brooklyn Apple Academy.
This project was such an immense pleasure to be involved with. I love the work that I normally do as an arts educator, but it involves designing and building shows with between fifty and eighty children or visiting the classrooms of over one hundred children to teach puppetry on any given day. It was such a wonderful experience to really focus on seven young human beings for a whole week. Also, I usually teach storytelling, theater design and puppetry, and this was my first time teaching cooking. One of the things that I love about teaching is that, even if you are teaching something that you know how to do really well, you always learn something new through instructing others. I am hopeful that we will do it again (and even better) next year!
 DAY ONE (Popovers, Mayonnaise and Fruit Curd)
We started out by tasting the basic flavours (sweet, salty, spicy, bitter, sour, umami) and charting out which flavours each kid liked and didn’t like. As the week went on, we would talk about which of these flavours we detected in cheeses, mayonnaise, meringues and all of the other foods we cooked. Also, the one kid who insisted, on the first day, that he hated everything but sweet had to gradually admit that he also liked salty and sour flavours.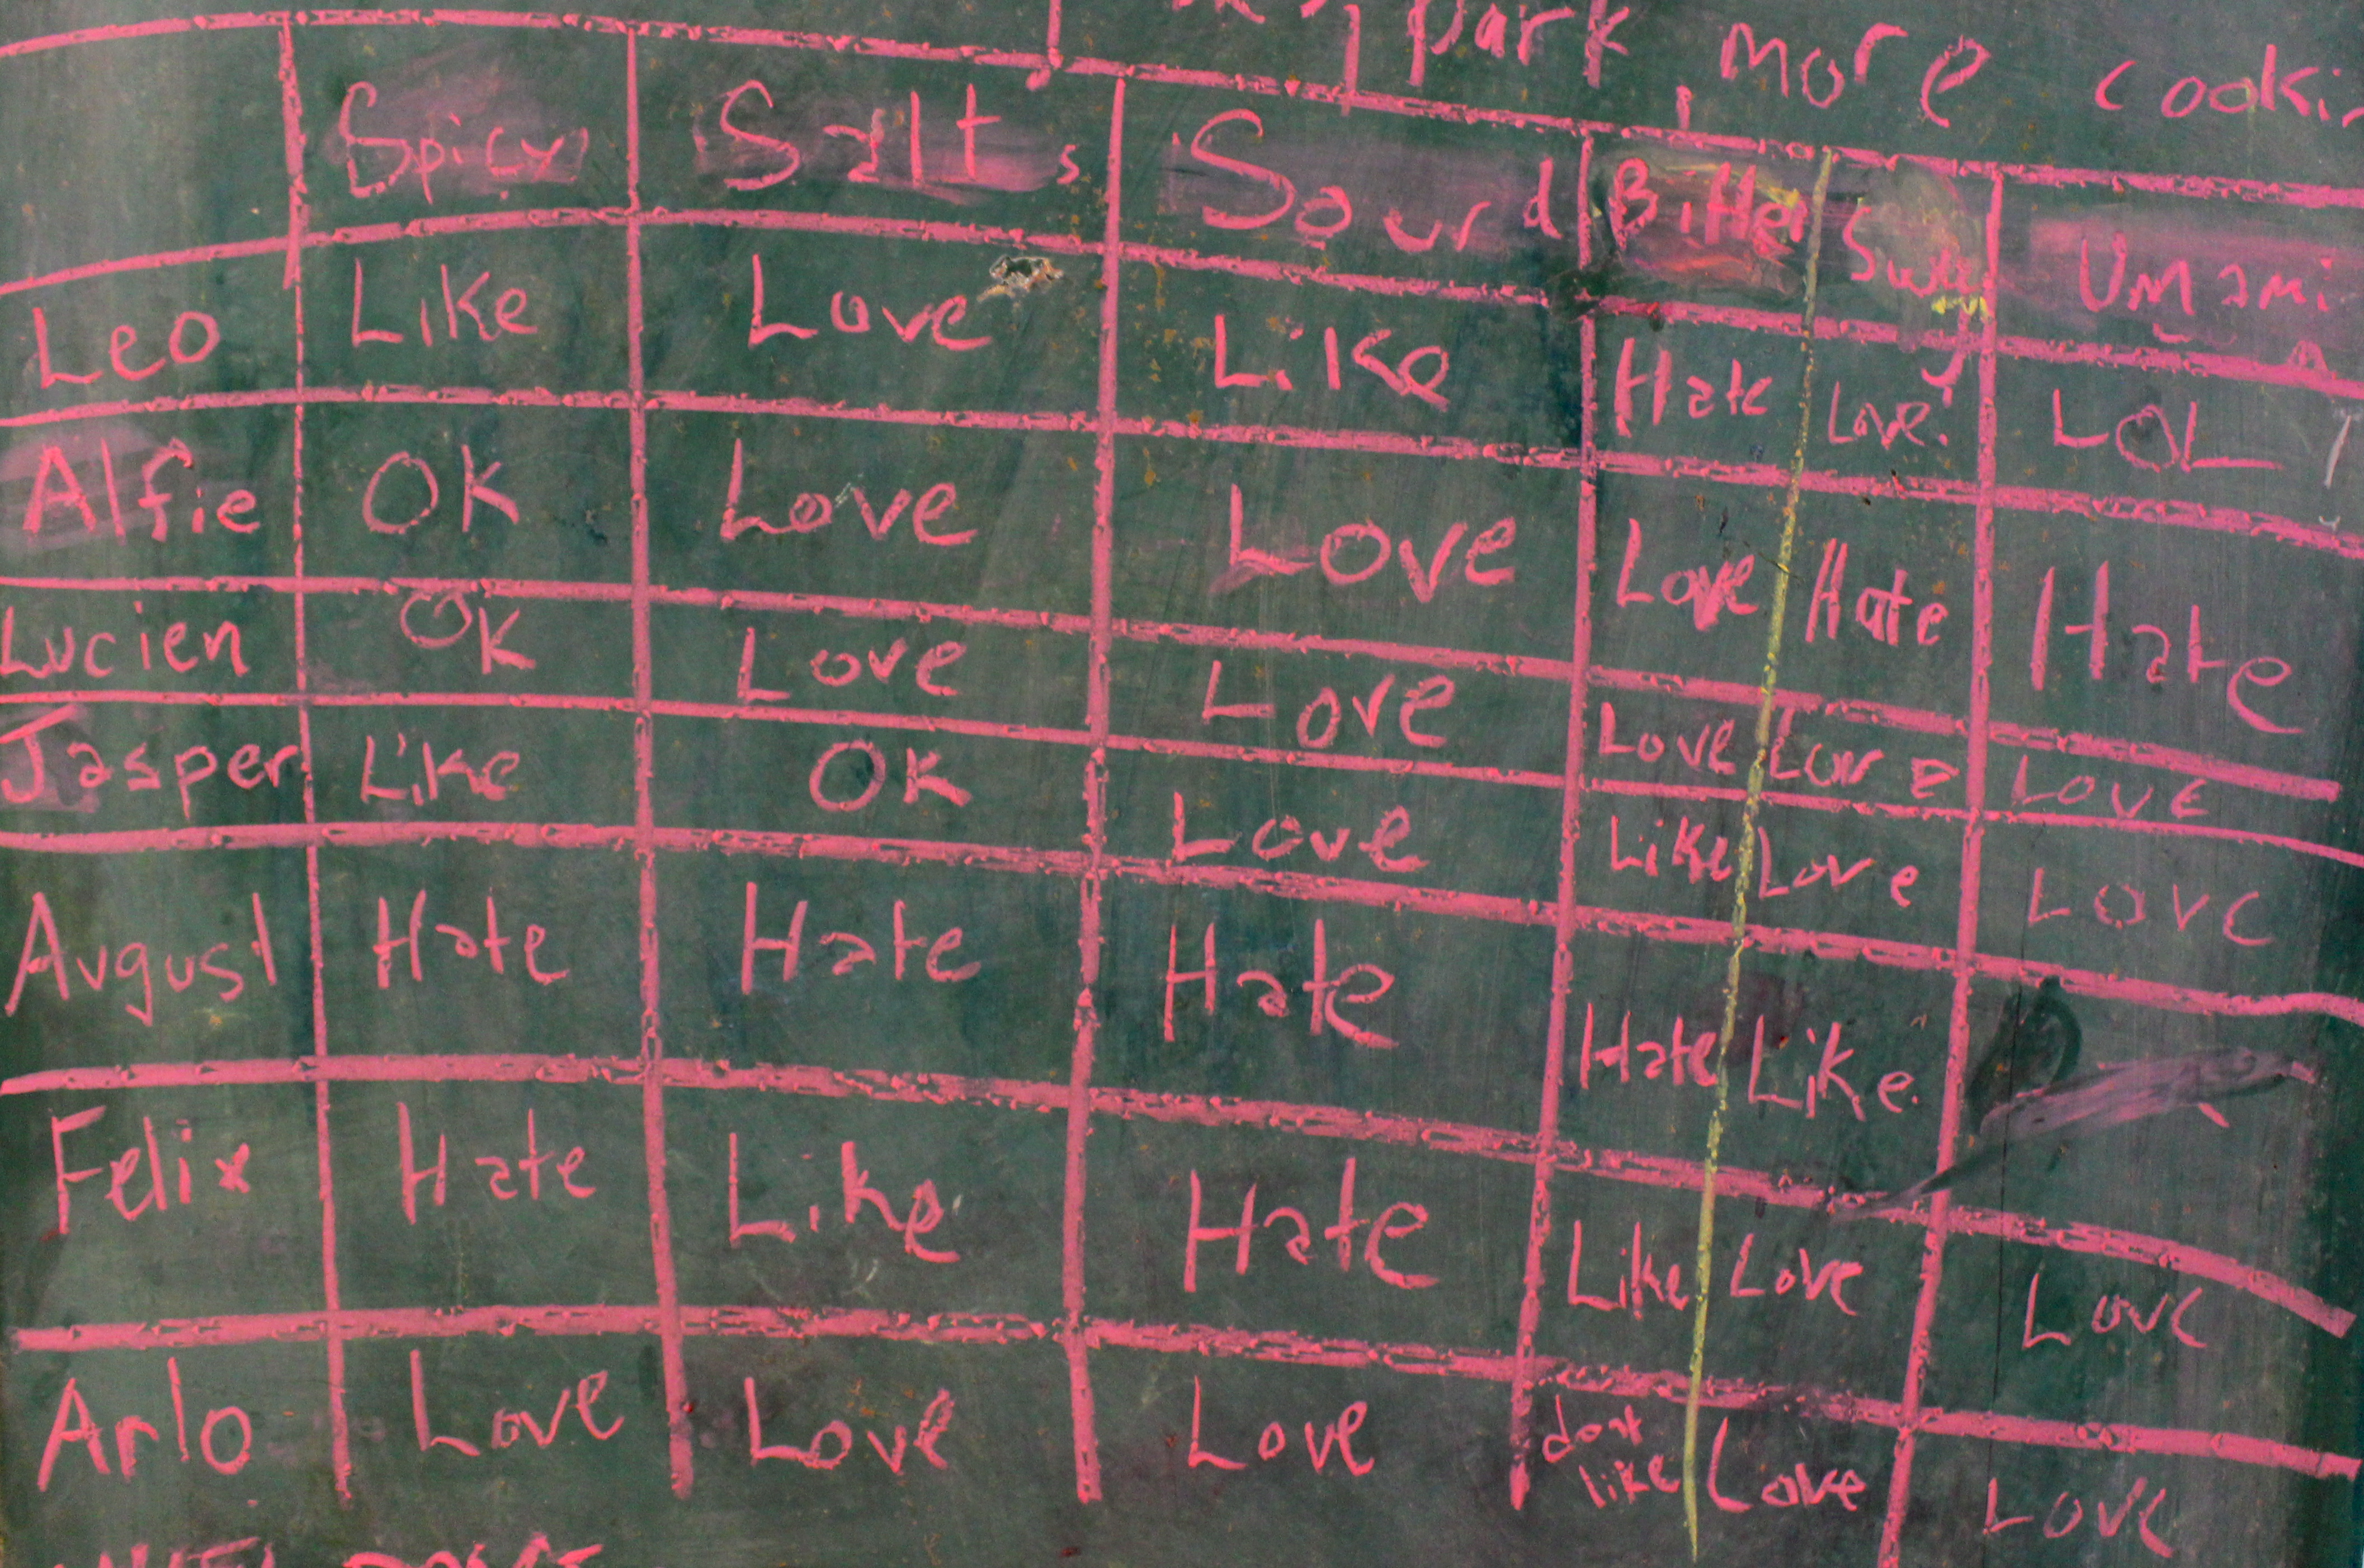
We learned how to separate eggs, which takes practice. We were going to make meringues with the egg whites eventually so there could be no bits of yolk mixed in! The failures were saved to make into frittata and the egg whites were saved for meringue making. We made some of the egg yolk into homemade mayonnaise and I was impressed that everyone, even those who claimed to hate mayonnaise, at least tried it. A few of those haters admitted that homemade mayonnaise is tastier than store-bought.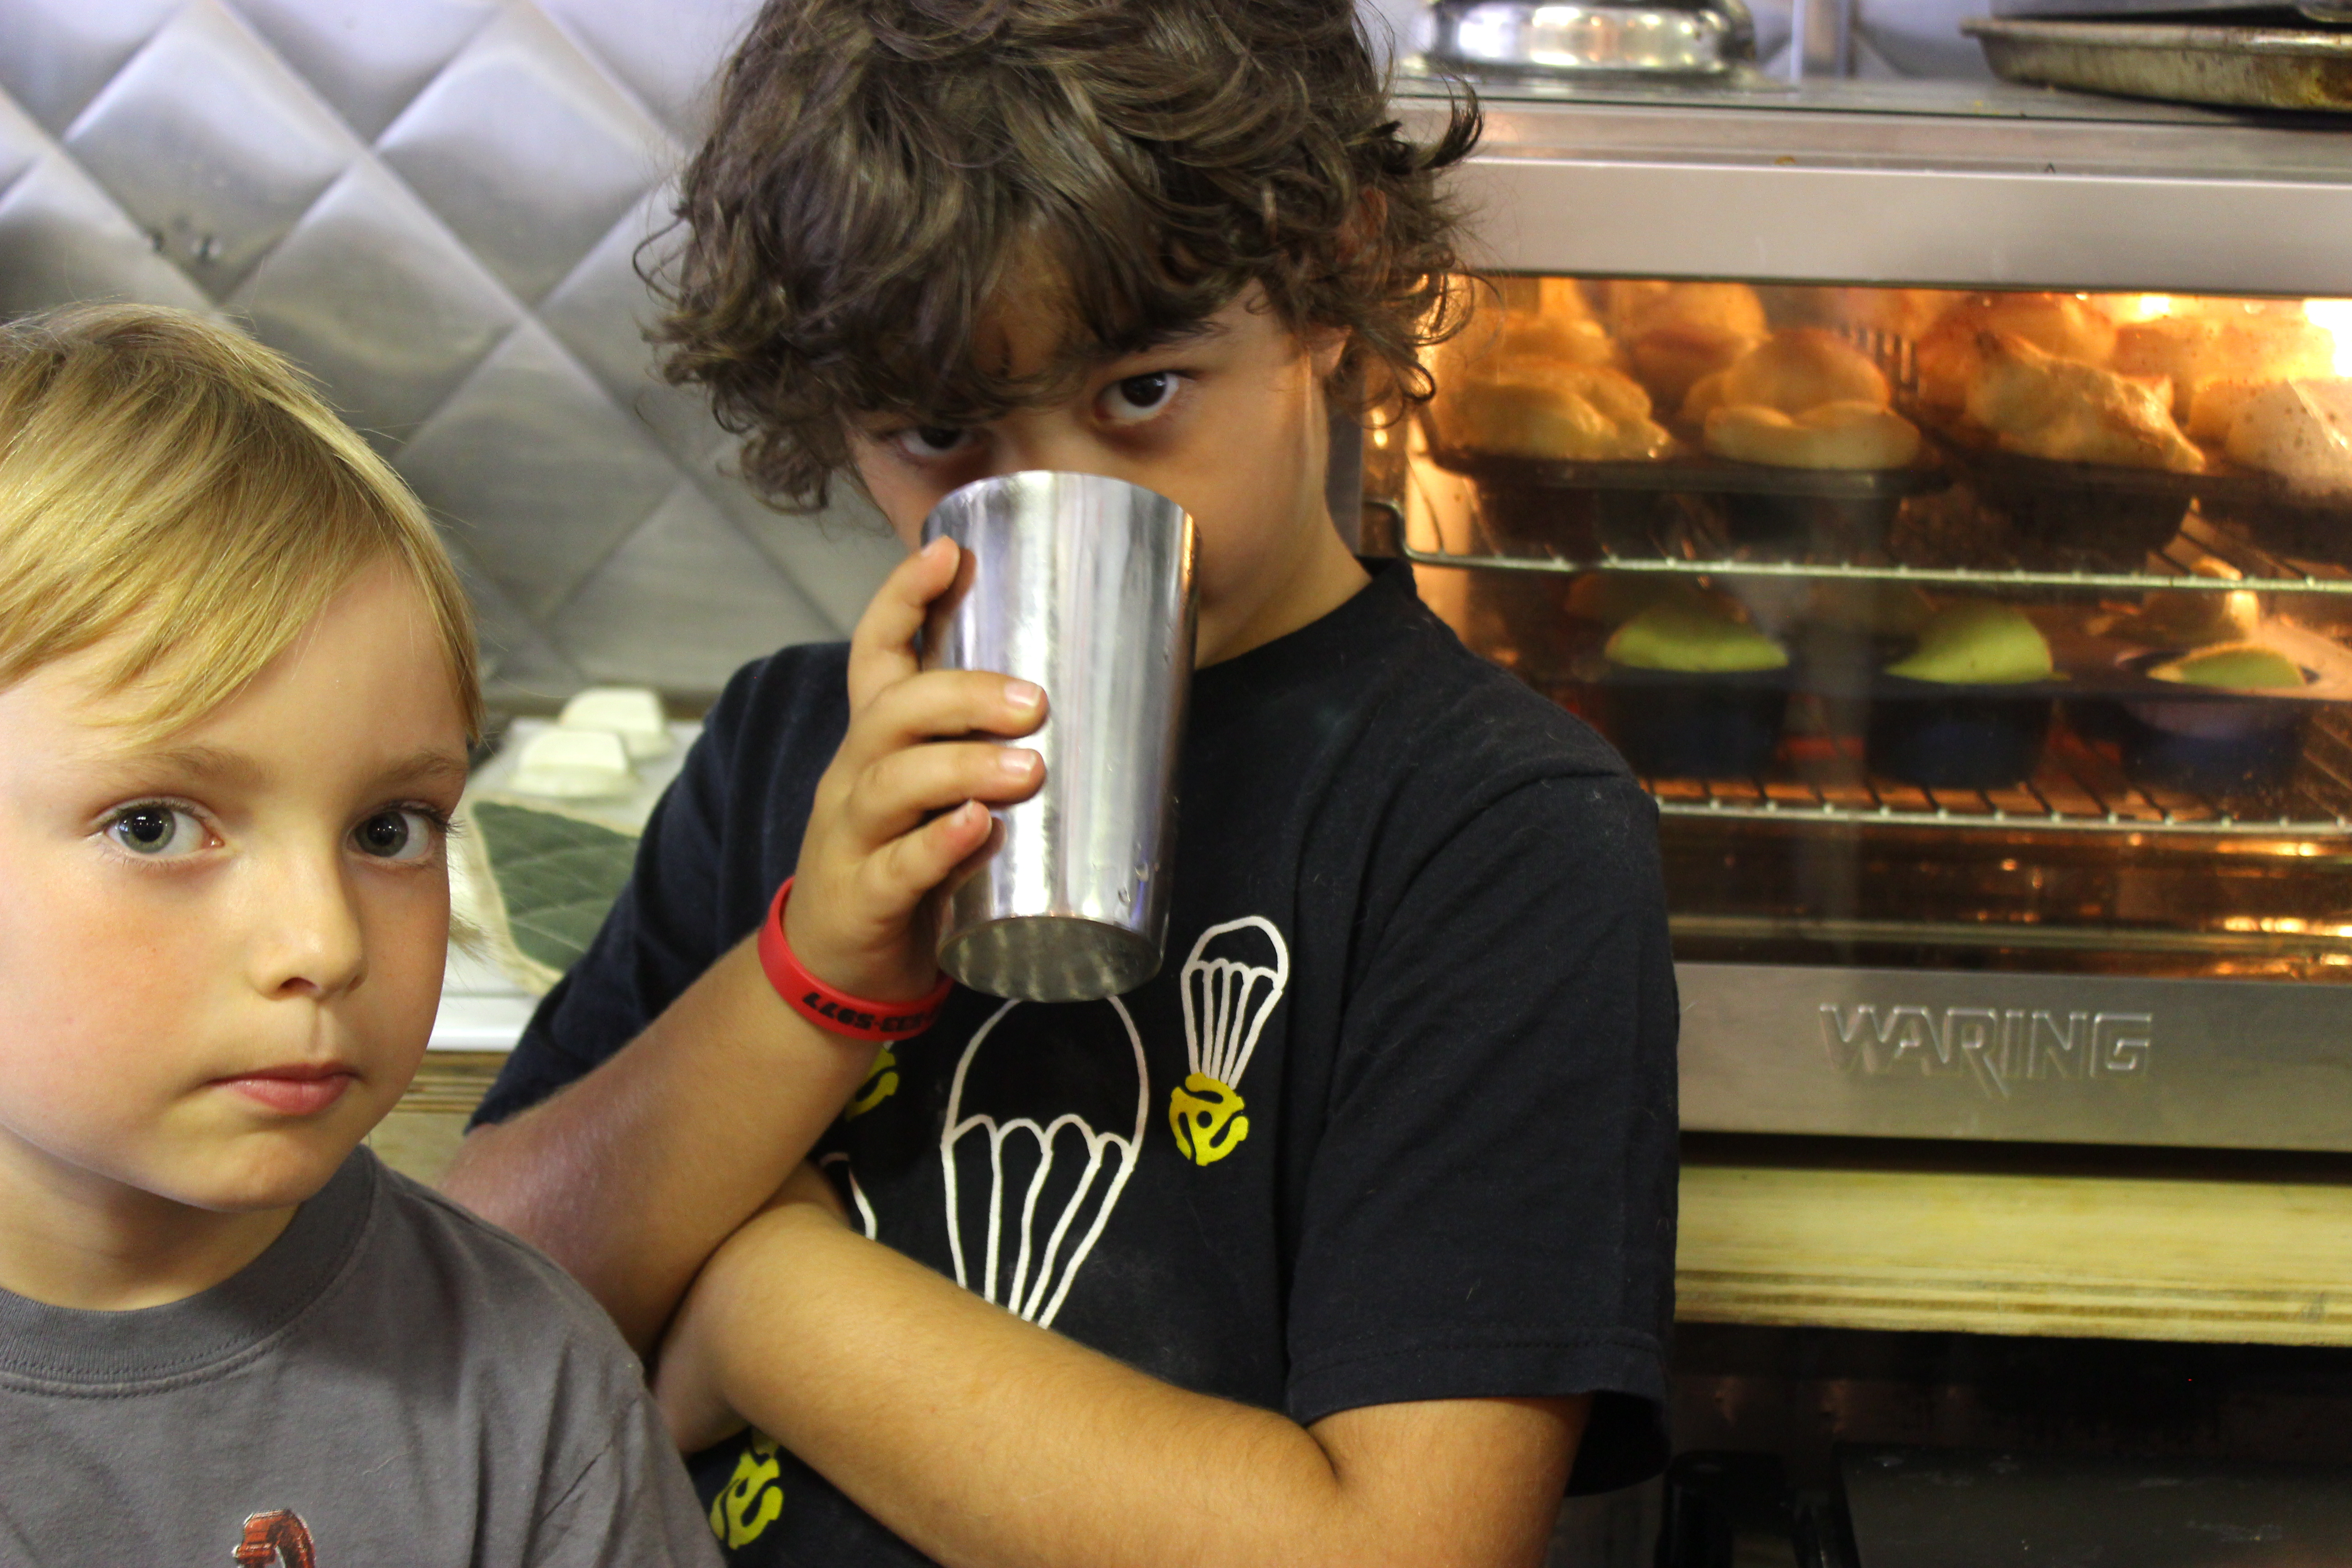
Since we were focusing on the magical properties of eggs, we also made popovers. The Sunview has an awesome see-through oven that is right at kid eye level, so that the bakers could watch the popovers pop. Some of us made our sandwiches on popovers for lunch. The more adventurous put the popovers, and the mayonnaise, and the cheese, tomatoes, lettuce and pickles INTO the sandwich. Culinary genius. I’m serious, watch out for this one.
After lunch, we made the rest of our egg yolks into fruit curd. I showed the kids how to cut a mango so that you can turn it inside out and pluck little cubes off of the skin. Some of the mango actually made it into our mango, lime curd…which is crazy delicious and everyone should be making and eating all the time. I more or less followed this recipe for mango curd, BUT the big lesson that I learned from this project was You don’t need to follow a recipe to make fruit curd. After the first small group helped me make mango curd another small group made raspberry curd, and then another small group made lemon curd and somewhere along way the measuring and fretting just stopped.
FRET FREE INSTRUCTIONS FOR MAKING FRUIT CURD (WITH OR WITHOUT CHILDREN)
- Start a pot of water boiling.
- Puree your fruit. If you are using berries or rhubarb, cook the fruit until it is tender and then puree it. If your fruit has seeds or other solids strain those out. Maybe you meant to use two mangoes but small children ate all of the nice cubes and you were left with only the flesh that you could cut off of the seed? That’s fine. You could use as little as 1/2 cup of citrus juice or as much as 2 cups of pureed fruit. It will all work.
- Add 4 egg yolks, 1/2 cup sugar and a pinch of salt to the fruit puree and whisk to combine. If the fruit you are using is very sweet, squeeze a lemon or lime in there too. The children you are cooking with put a heaping 1/2 cup of sugar that was probably closer to 3/4 cup in? That’s fine…maybe add a little more lemon or lime juice. Or perhaps the children spilled half of the sugar and only got a 1/4 cup into the bowl. That’s fine too.
- Transfer the fruit puree to a metal bowl and set it above, but not touching the boiling water. Stir the curd with a wooden spoon for about 10 minutes or until it begins to thicken. The timing of this will vary depending on how much fruit made it into your curd. More fruit, more cooking time. I did this step myself because the safety of our makeshift double boiler was iffy and it was a 90 degree day, which made stirring hot curd not so much fun.
- When the fruit curd is thick remove it from the heat and stir in 1/4 cup (1/2 stick) butter one small chunk at a time. Cool, then refrigerate the curd.
We tried the curd on the last of the popovers at the end of the day, and put the rest of it away to be used in the dessert that we would serve to the parents on Friday.
 DAY TWO (Frittata, Meringues and Vinaigrette)
On Tuesday, we continued our exploration of the egg. Noah taught the kids how to make frittata with the eggs that were broken in our egg separating lesson. Noah is a master frittata maker.


NOAH’S FRITTATA TECHNIQUE
- Saute the vegetables in olive oil.
- Add the cooked veggies to some whisked eggs (we used the broken ones from day 1) and cheese. Pour the egg and vegetable mixture back to the pan and cook over low heat.
- Finish the frittata in the broiler.
I had the kids taste and compare oils (olive, sunflower and sesame), sour elements (white wine vinegar, balsamic and lemon), sweeteners (honey or sugar), salts (plain, smoked and pink sea salt) and peppers (black, white, pink and Szechuan). They then each made their own vinaigrette using their favourites. Here are the vinaigrette recipes…
Populist Vinaigrette a la Jasper and Felix
- Sunflower oil
- Lemon Juice
- Pink Hawaiian Sea Salt
- Black or white Pepper
- Sugar and honey
Sesame Vinaigrette a la Lucien
- Sesame oil
- Balsamic vinegar
- Table salt
- White pepper
- Honey
Complex Vinaigrette a la Alfie
- Olive Oil
- White wine Vinegar and Balsamic Vinegar
- Lemon Juice
- Pink Hawaiian Sea Salt and table salt
- Pink peppercorns
- honey and sugar
Minimalist Vinaigrette a la August
- Olive Oil
- White Wine Vinegar
- Pink Hawaiian Sea Salt and table salt
- Sugar and honey
Peppery Vinaigrette a la Arlo
- Olive Oil and Sesame Oil
- Balsamic Vinegar
- Pink Hawaiian Sea Salt and table salt
- Sugar and honey
- Black, white, pink and Szechuan pepper
For lunch we had frittata and salad drizzled with the vinaigrettes. I combined all of the leftover salad dressing and we saved it to dress the salads for the parents on Friday.
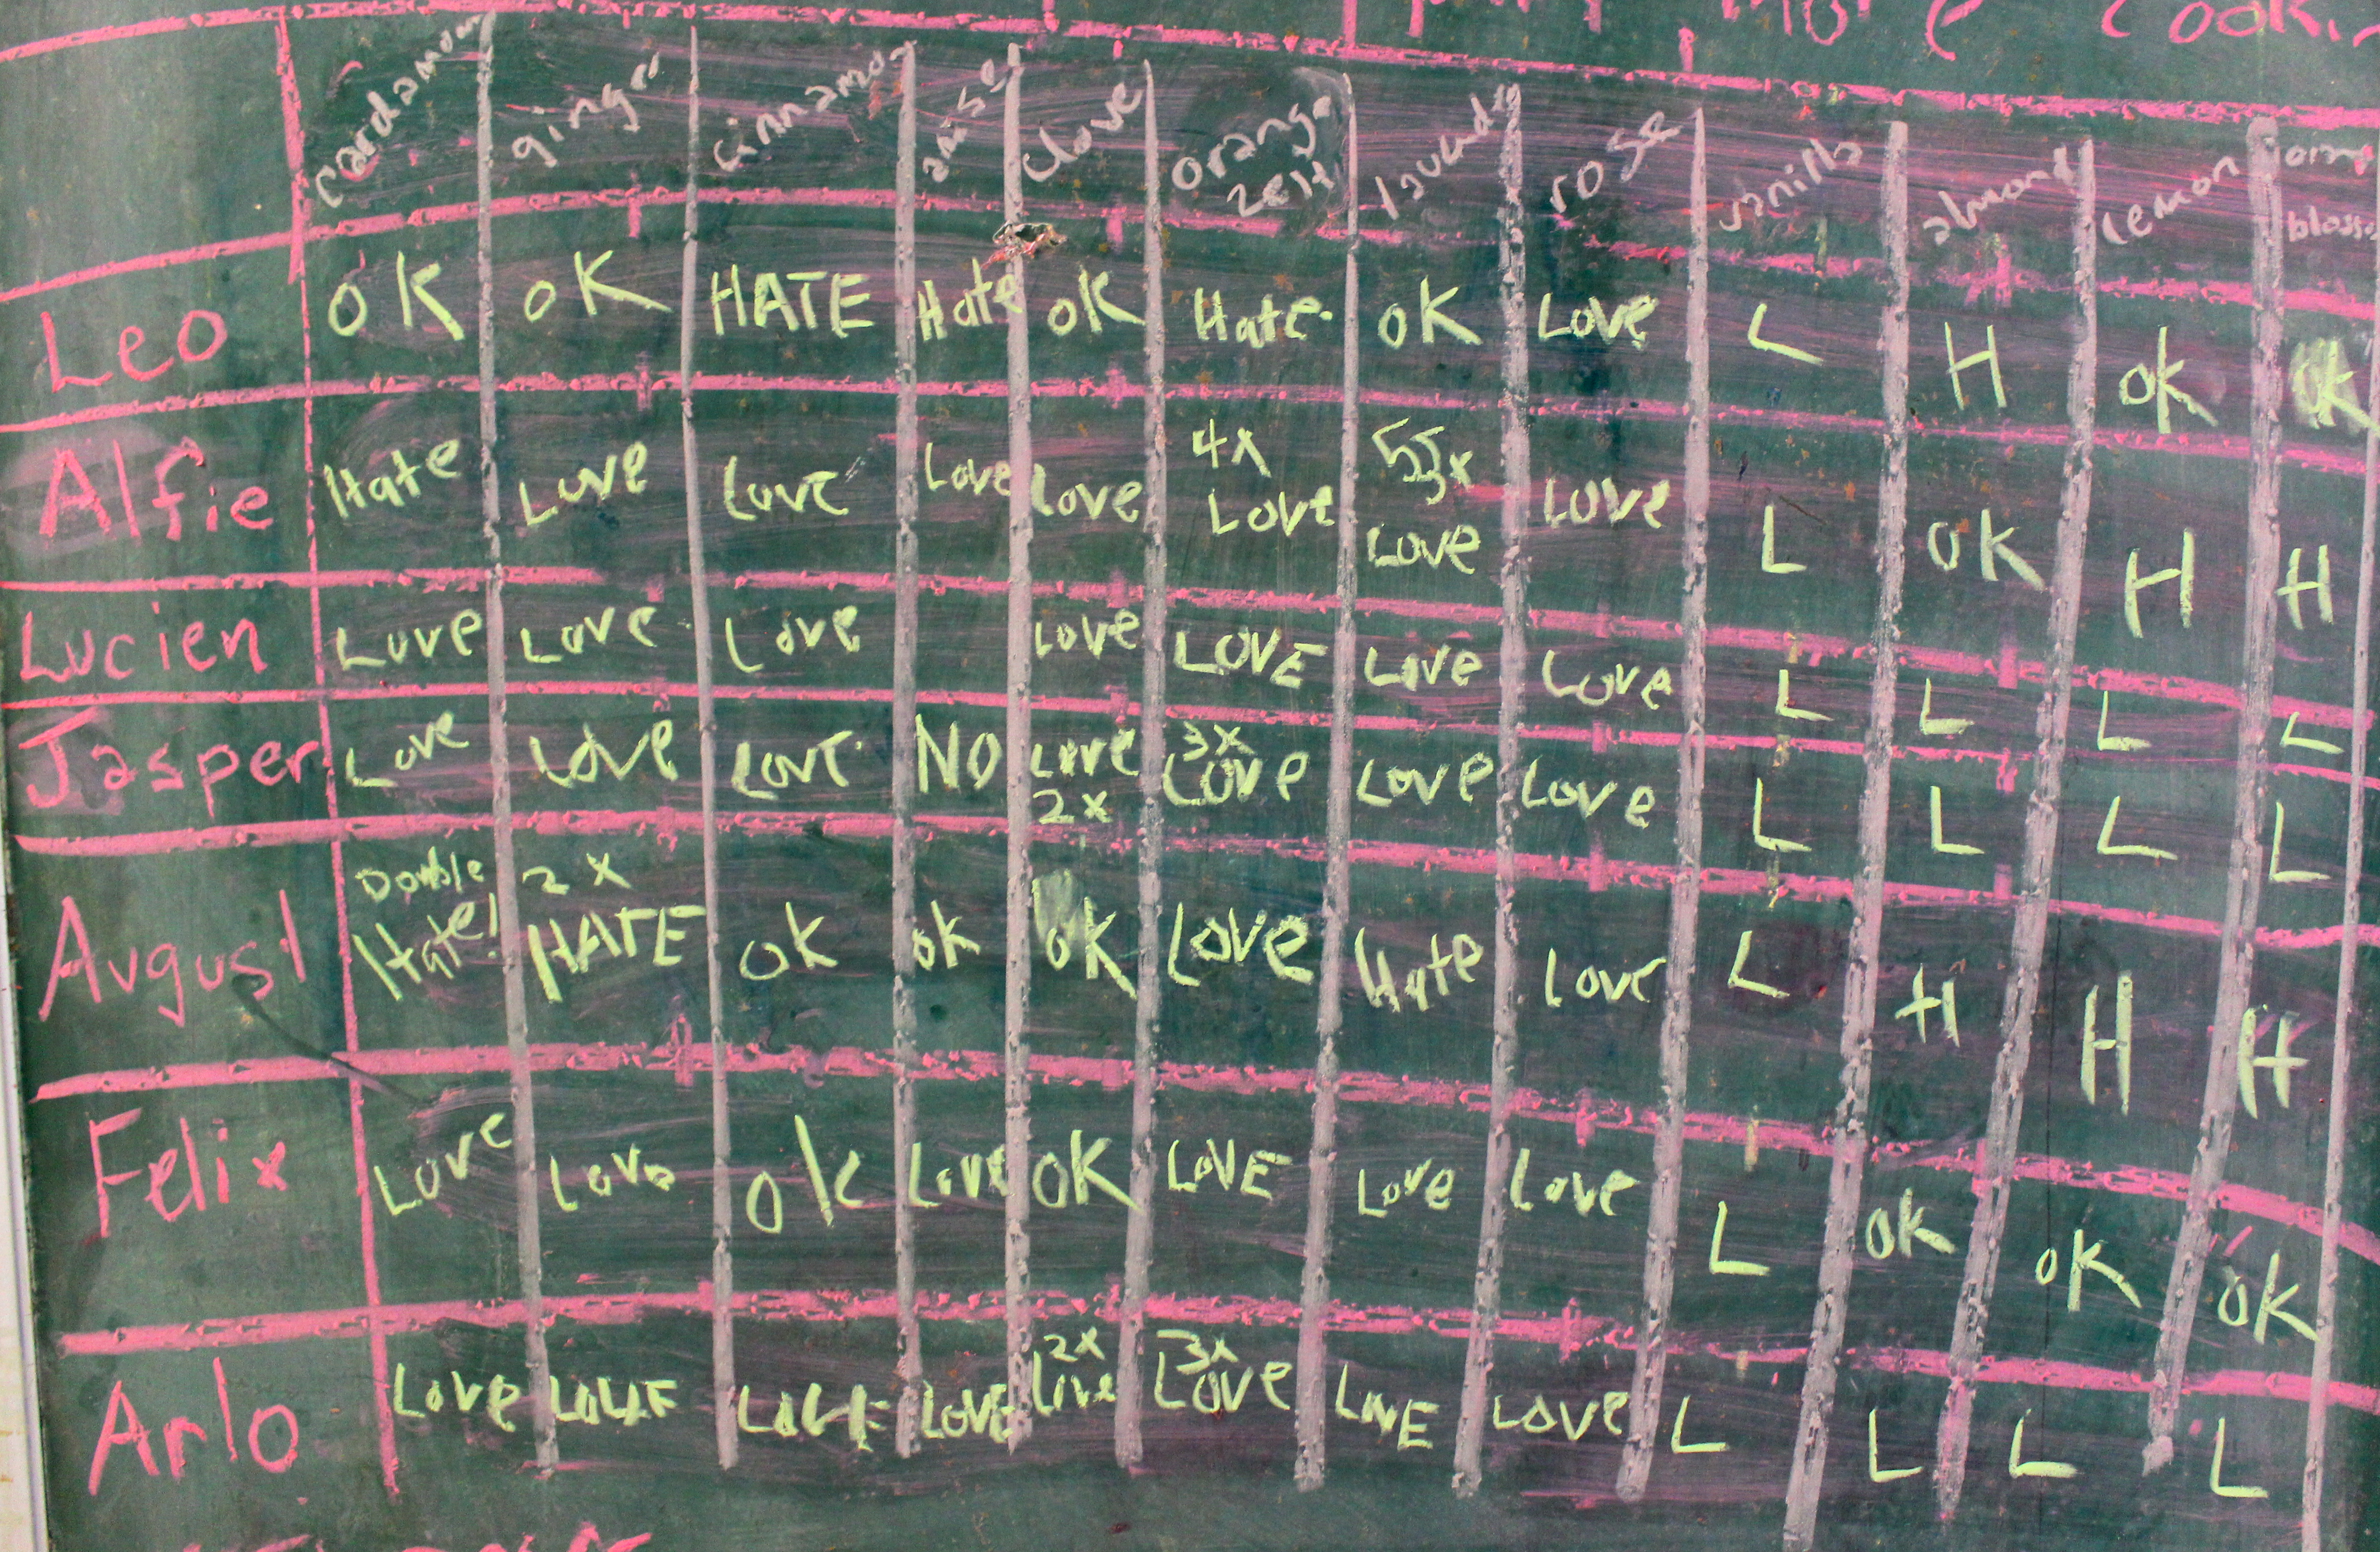 In the afternoon, I had the kids smell about 12 different baking spices and aromatic essences and we charted which ones they liked. Based on their preferences, we came up with three flavours of meringues.
MERINGUE FLAVOURS DESIGNED BY BOYS
- Vanilla and Rose Meringues by Leo and Jasper
- Orange Zest, Cinnamon and Clove Meringues by Alfie, Lucien and August
- Lavender and Ginger Meringues by Felix and Arlo
Pretty delicious right? I have to say that making meringues with kids is really fun. I highly recommend it.


KID-MADE MERINGUES
- Preheat the oven to 300 degrees.
- The kids can pound any dry aromatics that you are using in a mortar and pestle or whir them in a spice grinder.
- Kids can measure the 1/2 cup egg whites (4 egg whites), 2 Tablespoons cornstarch and 1 teaspoon vinegar into the standing mixer. Pouring egg whites is tricky so have some extra in case they spill. It is important to establish that pouring and measuring involves keeping your eyes on your task!
- The kids can turn the standing mixer on high and watch the egg whites transform into the consistency of shampoo bubbles. Next they should watch for the the bubbles to become become smaller and for the mixture to become shiny. then they can turn the motor off . Let everyone play with the foam to see if it forms peaks.
- Once the egg whites have stiff peaks, have the kids start the motor again and take turns adding heaping teaspoons of confectioners sugar one teaspoon at a time until they have added 2 cups. Adding the confectioners sugar gradually is important, as it avoids a grainy texture. I personally find this task tedious, but the boys found it thrilling and worked diligently to make sure that everyone got a turn while keeping the pace up. Also, they ended up covered in powdered sugar, so…bonus. It is fine if much of the sugar does not actually make it into the meringue.
- When the sugar is all added, put in some of the aromatics with the motor still running. Stop the motor and have kids taste the meringue and decide if it needs any more of the aromatics.
- My friend and fellow food blogger Claire from A Cheesemonger’s Daughter taught us to hold the bowl upside down to make sure that we had achieved the correct consistency. We did it over Noah’s head and nothing fell out of the bowl.
- The kids really enjoyed taking turns plopping meringues onto the parchment paper lined baking trays and using their fingers to create a little swirl on the top. We policed each other to crack down on the desire to squish your finger all the way into the meringue rather than swirling delicately up. We also exercised major self-control by not licking our fingers until we and finished making all of the meringues. For some kids this involved chanting, “No licking yet! No licking yet! No licking yet!” while they worked. Anywhere between 6 and 12 meringues is fine.
- Bake the meringues for 40-45 minutes (depending on how large your meringues are). You must let the meringues cool in the oven without bothering them, or they will collapse.
I left the oven on broil (from frittata making) and the first batch turned out more like burnt marshmallows. They were weirdly delicious, but don’t do that. We happily made new batches of meringues (on the right setting) to serve to the parents later in the week.


DAY THREE (cooking out and fancy cheese tasting)
On day three we went to Prospect Park and cooked corn, okra, potatoes, asparagus and veggie dogs over an open flame. Noah taught the kids how to build and maintain a fire. There was also a lot of running around with sticks and other play. Over lunch, I told an Anansi story about a boastful tiger who becomes terrified of talking yams.


After the park, we visited Blue Apron Foods, an exquisite family owned specialty food shop in Park Slope, Brooklyn. The expert cheesmongers at Blue Apron taught us some cool stuff about why cheddar is crumbly (a cutting and stacking process called…cheddaring) and what makes some cheese orange (annatto made from the seeds of the achiote tree). They gave the boys an extensive cheese tasting and invited them to consider the differences between cow, goat and milk cheeses as well as old and young cheeses. Alfie pointed out that aged gouda has a tomato-y flavour. It’s true! Aged gouda is delicious because it has a sweet, tart, earthy, tomato-like flavour. I had never noticed this, although aged gouda is my favourite kind of cheese.


DAY FOUR (home-made ricotta and fresh pasta)
By Thursday we really needed to get going on making the food to serve the parents on Friday. Noah taught the kids how to make fresh pasta, and before long they were cranking out masses of the stuff totally independently. The kids had the great idea of feeding loose flour through the top of the machine while cutting the noodles to help with stickiness. Lucien also enjoyed personifying the pasta dough as it was flattened and cut. “NO! Don’t squish me! Don’t slice me!”
The kids made fresh ricotta with me, which I had never done before. They kept an eye on the heating milk and turned it off as soon as it reached boiling. We noticed that you can tell when milk is about to boil because it develops a skin across the top. Waiting for milk to boil is boring, so they also took turns mincing the basil and parsley that we would add to the finished ricotta. They made predictions about what might happen when we added the vinegar (they were hoping for fizzing or an explosion). Everyone had a turn shaking the cheese curd bag to help drain the whey from the curds. It was really easy and the result was delicious. We made most of it into herbed ricotta to serve on top of the pasta. A smaller portion was blended with honey for Friday’s dessert.


HOME-MADE FRESH RICOTTA WITH HERBS
- 6 cups whole milk or combination whole milk and heavy cream (we used 4 cups whole milk and 2 cups heavy cream)
- 1 teaspoon salt
- 3 Tablespoons white wine vinegar
- 1 bunch of basil
- 1/2 bunch of parsley
- the zest of 1 lemon
- Add the milk (and cream) and salt to a non reactive pot. Bring to a full boil over medium heat, stirring occasionally. As soon as it boils, remove the pot from the heat and stir in the vinegar. Allow the mixture to stand for 1 minute. It will curdle and separate into curds and whey.
- Set a large sieve over a deep bowl. Line the sieve with 2 layers of damp cheesecloth.
- Pour the mixture into the cheesecloth-lined sieve and allow it to drain into the bowl at room temperature for 20 to 30 minutes. It is also fun to shake the cheese bag to help the liquid come out. Transfer the ricotta to a bowl, discarding the cheesecloth and the whey. Cover with plastic wrap and refrigerate.
- Stir in the herbs and lemon zest and adjust the seasoning before serving.


DAY FIVE (cooking for and serving the parents)
So much happened on Friday! The kids made more pasta and more meringues and grated beets and carrots for the salad. We made polenta and a marinara sauce for the gluten and lactose free options. We panicked about having enough food (not a problem in the end) and bought bread and ingredients for this very simple and delicious White Bean Gremolata Dip, which Alfie artfully garnished with olive oil and paprika.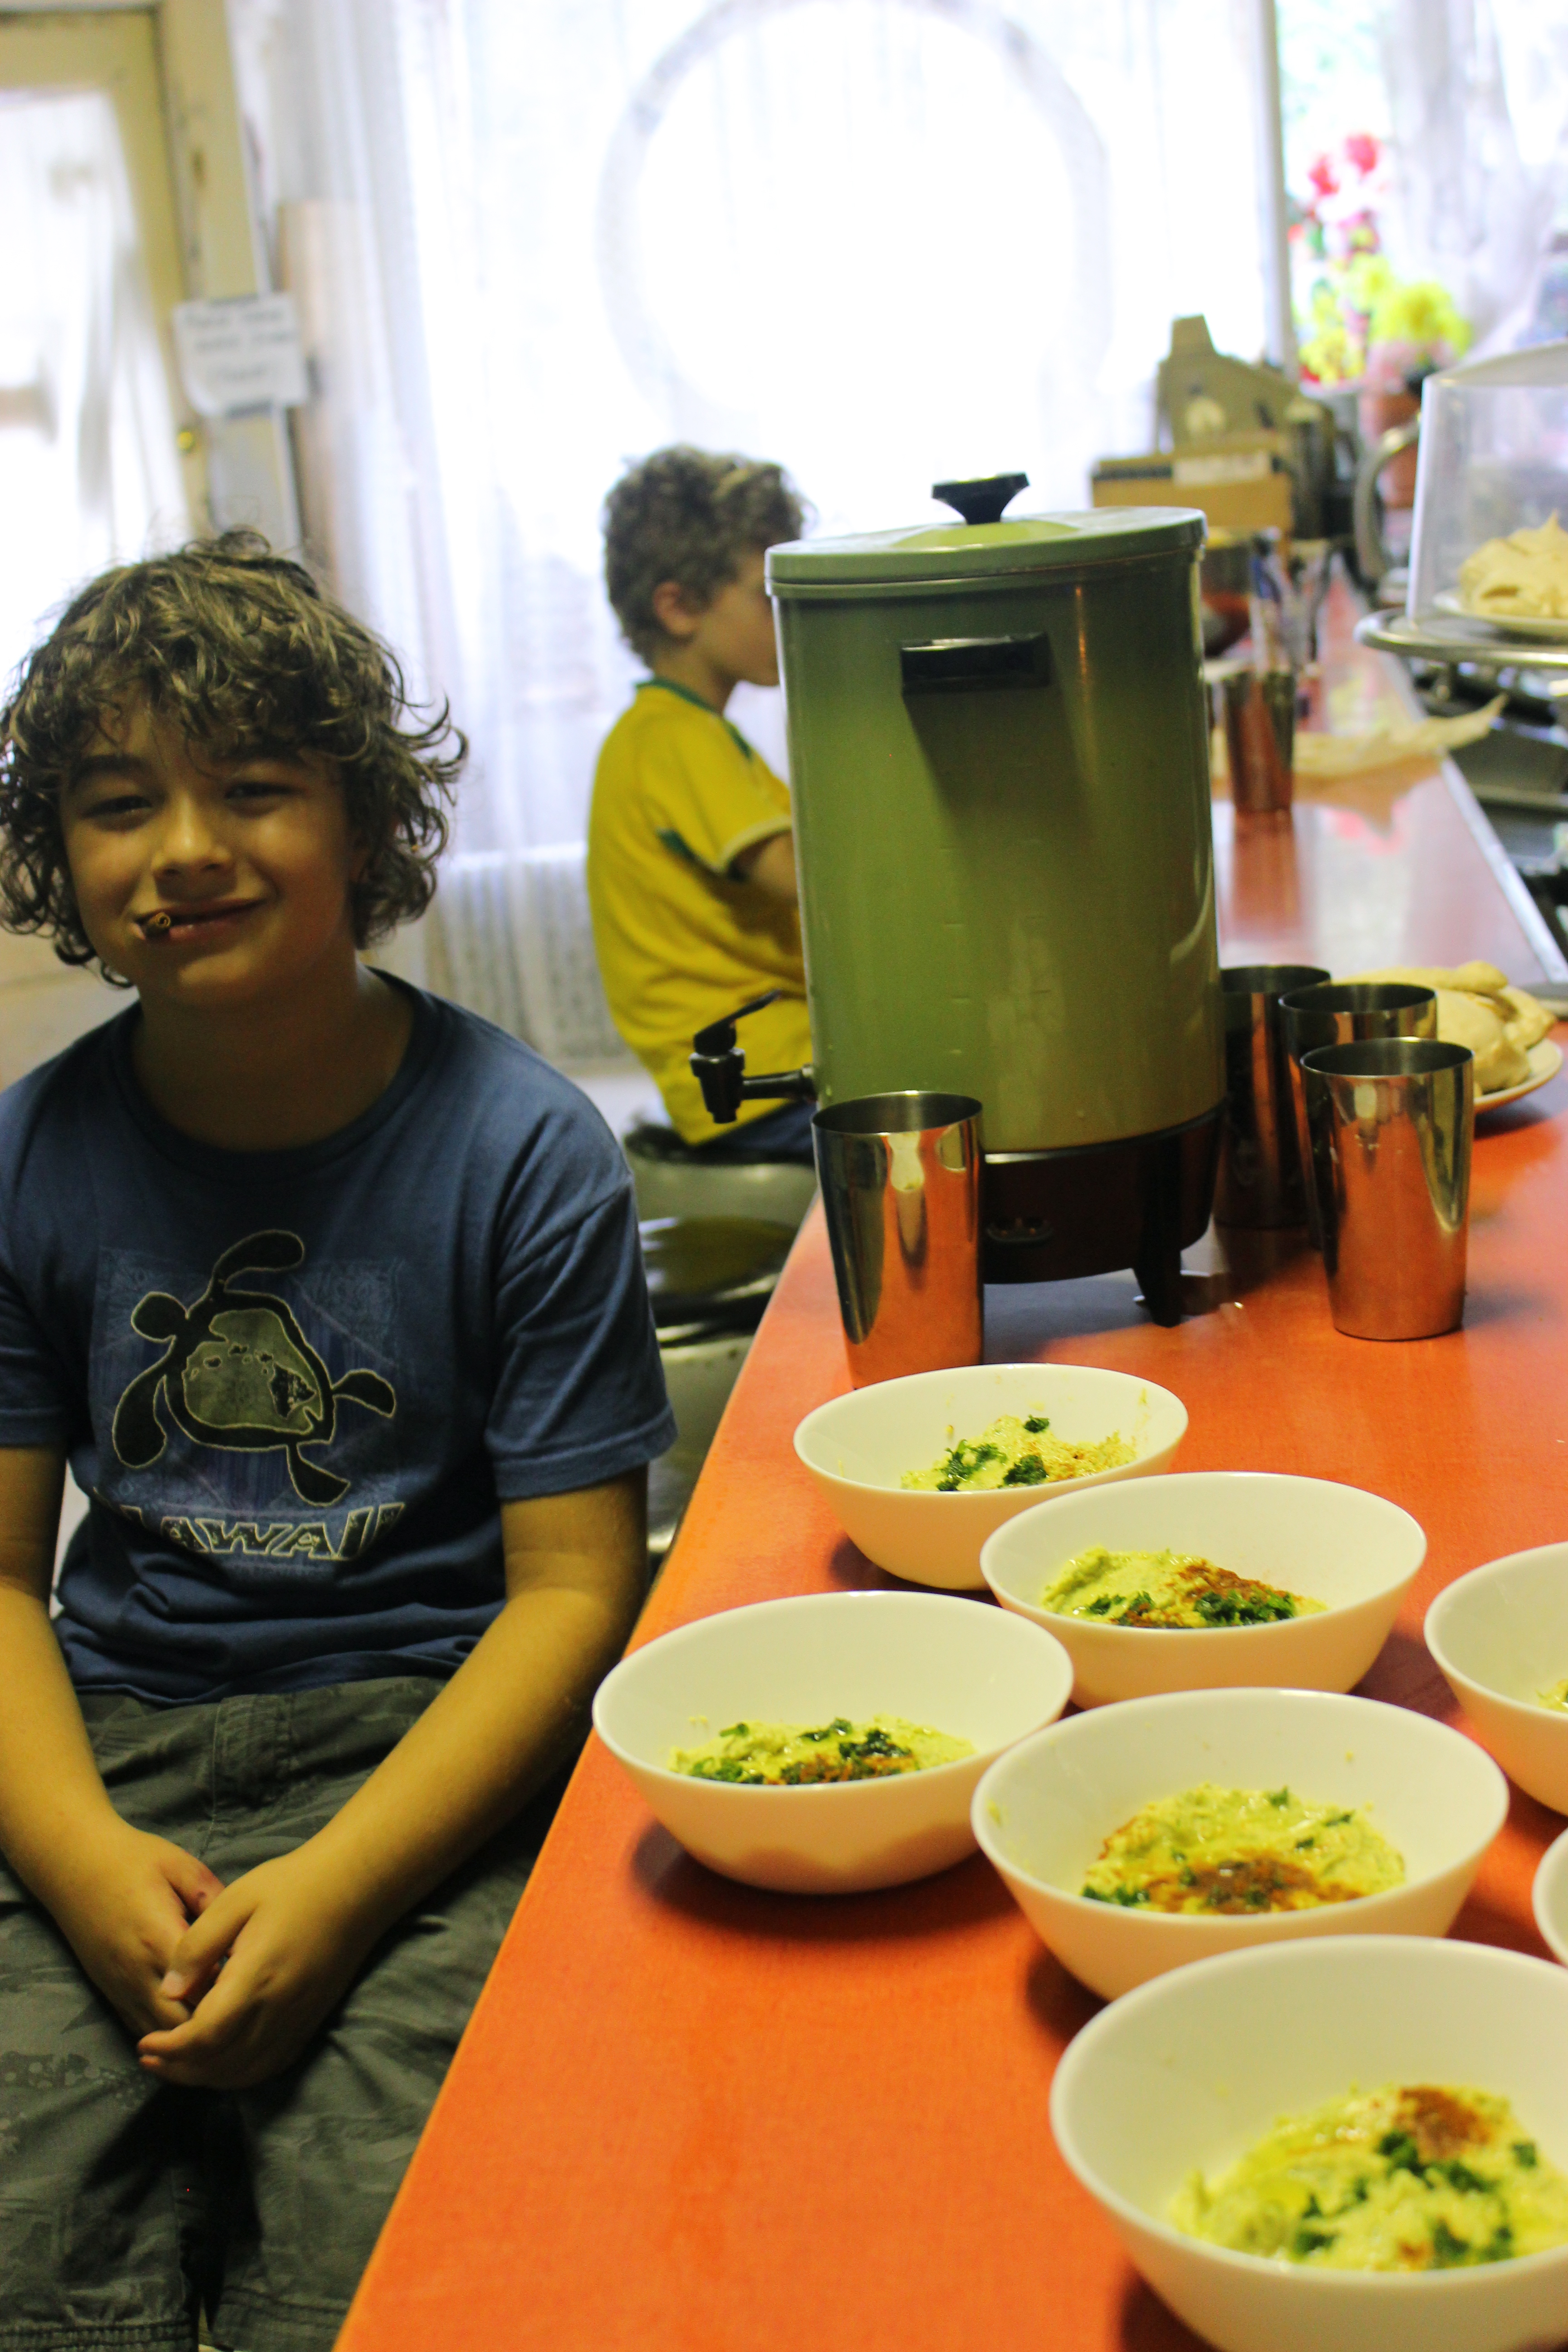
The kids decorated the menus.
The kids cleaned up.
The kids set the tables.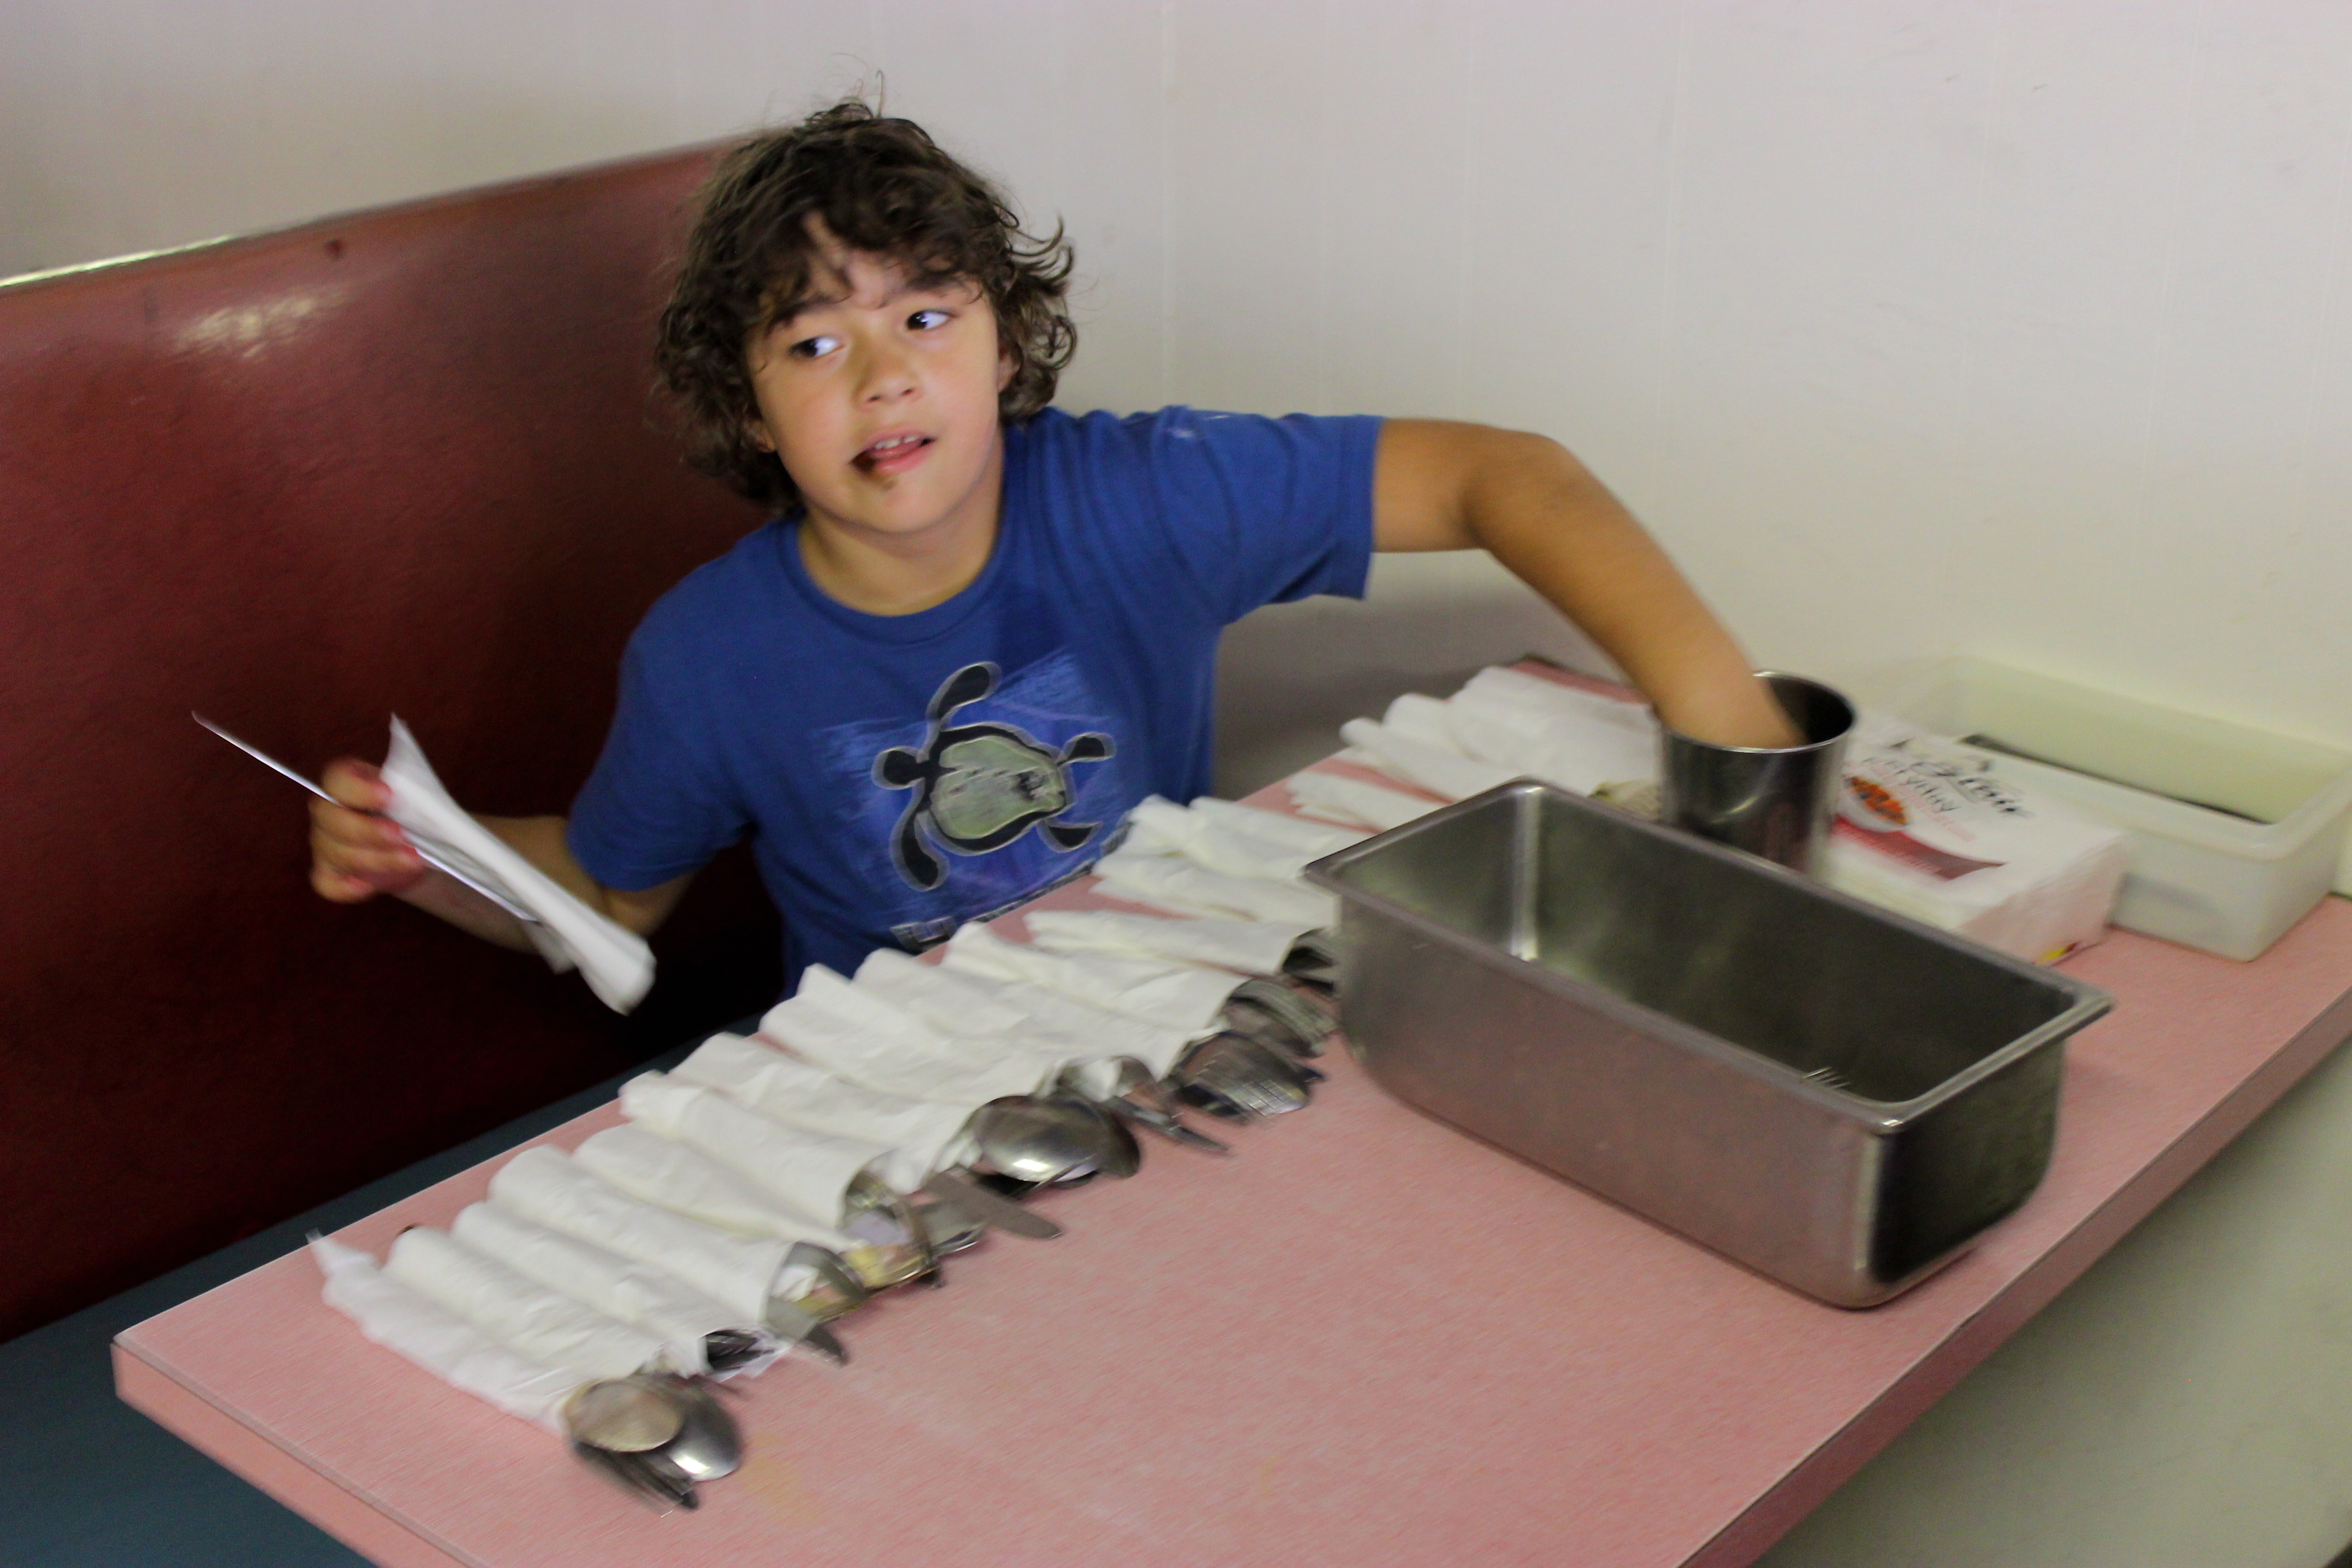
Then the friends and family arrived, and the kids served them their meal!


What a delightful story about life-brightening events! If as a child I had been sent to your playful Cooking Camp every summer instead of to vile ‘Vacation’ Bible School, my distrust/hatred of the ‘System’ might have been much diminished. THANK YOU for giving these kids a better start.
Let’s have a do over and cook together some summer!